

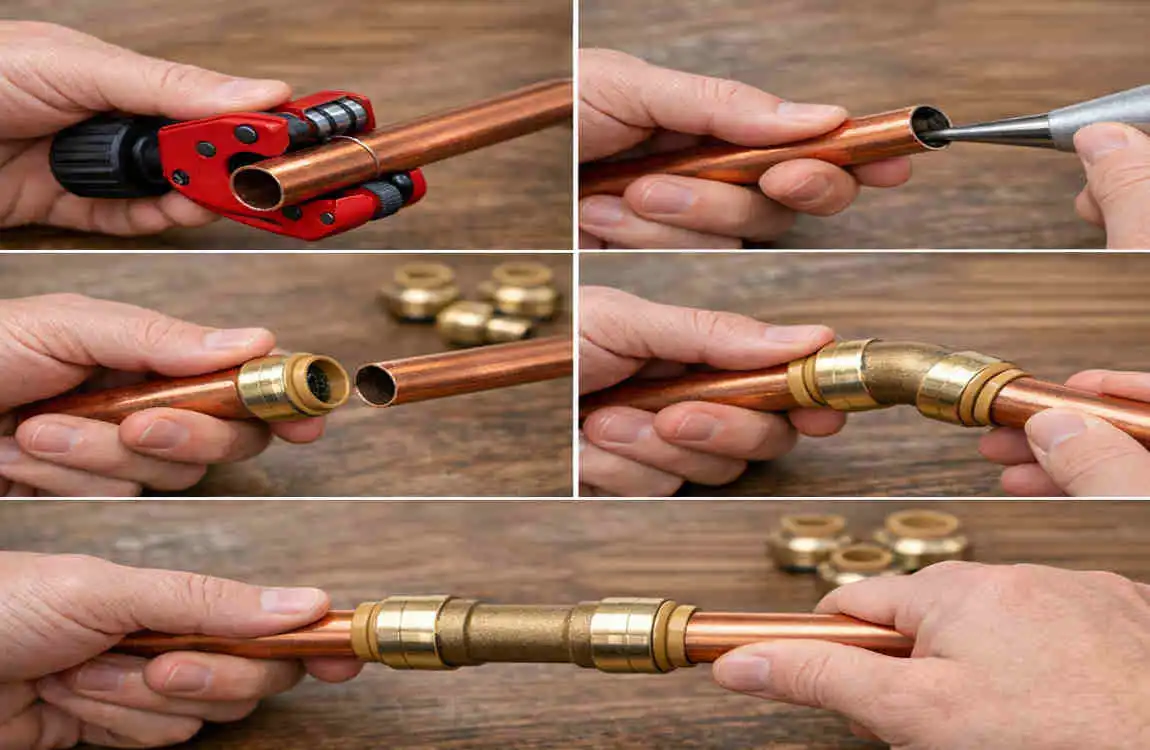
If you want a faster way to handle small plumbing jobs, learning how to use SharkBite plumbing fittings is a great skill to learn. These fittings are popular because they let you connect pipes without soldering, threading, or special heat tools.
That makes them especially useful for DIY repairs. You can often use them with copper, PEX, and CPVC pipes, as long as the fitting is rated for that specific pipe type and size. Still, the job is not just about pushing a fitting onto a pipe. Pipe preparation, correct sizing, and proper installation matter a lot.
What Are SharkBite Plumbing Fittings?
How SharkBite Push-to-Connect Fittings Work
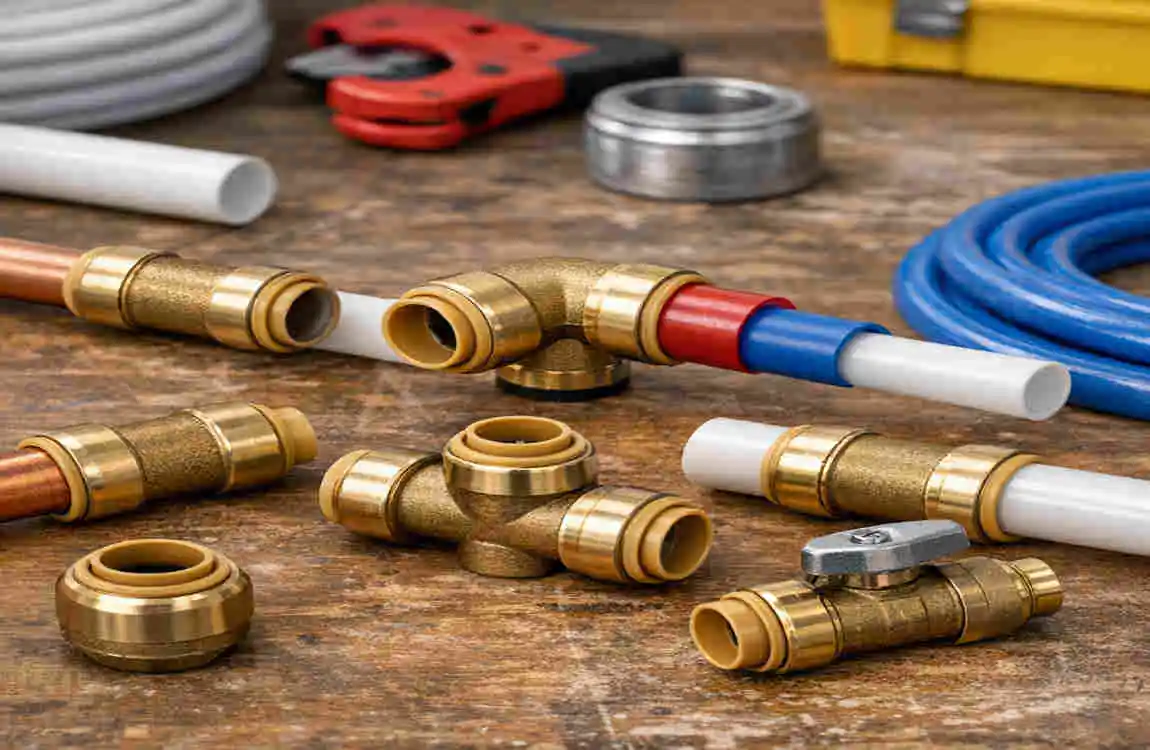
SharkBite fittings use a push-to-connect design. Inside the fitting, a gripping mechanism holds the pipe in place. There is also an O-ring seal that helps stop water from leaking out.
When the pipe is cut cleanly and pushed in to the proper depth, the fitting locks onto it. The grip holds the pipe securely, and the seal creates the watertight connection. That is what makes these fittings so convenient.
Types of SharkBite Fittings
There are several common types of SharkBite fittings, each with a different job.
- Straight couplings connect two pieces of pipe.
- Elbows change the direction of the pipe.
- Tees split one line into two.
- Adapters connect different pipe ends or fixture types.
- Shut-off valves allow you to stop the flow of water.
- Caps and plugs close off the open end of a pipe.
Which Pipes Can SharkBite Fittings Be Used With?
SharkBite fittings are made for certain pipe materials and sizes. Many are designed for copper, PEX, and CPVC, but not every fitting works with every system.
That is why you should always check the product label and manufacturer instructions before installing one. Pipe diameter, pipe condition, and compatibility all matter.
Tools and Materials You Need
Essential Tools
Before you start, gather the right items:
- SharkBite-compatible fitting
- Correct-size pipe
- Pipe cutter
- Deburring tool
- Depth gauge or measuring tool
- Marker
- Clean cloth
- Pipe clips or support, if needed
Why the Right Tools Matter
A clean cut and proper pipe prep make a big difference. If the pipe is crooked, rough, or dirty, the fitting may not seal well.
Taking a few extra minutes to prepare the pipe properly can save you from leaks and rework later.
How to Remove SharkBite Plumbing Fittings
Turn Off and Drain the Water
Before removing a fitting, shut off the water and relieve pressure in the line. This keeps the pipe from pushing water out once the fitting comes loose.
Locate the Release Collar
SharkBite fittings have a release collar. This part allows you to unlock the fitting from the pipe.
You will usually need a release tool or a similar method to press the collar evenly.
Release the Fitting
Press the collar while gently pulling the fitting away from the pipe. Do not force it or twist aggressively.
The fitting should come free once the collar is pressed correctly.
Inspect the Pipe Before Reusing It
Look at the pipe carefully. Check for scratches, dents, or deformation.
If the pipe end is damaged, cut back to a clean section before trying again. If the fitting looks worn or damaged, replace it.
Common Mistakes When Installing SharkBite Fittings
Not Cutting the Pipe Straight
An uneven cut can stop the pipe from seating properly. That can lead to poor sealing and leaks.
Skipping Deburring
Sharp edges can damage the seal or prevent the pipe from sliding in fully.
Using the Wrong Fitting Size
The fitting must match the pipe size and material. If it does not, the connection may fail.
Failing to Insert the Pipe Fully
This is one of the most common mistakes. A partly inserted pipe can look connected but still leak.
Installing on Damaged Pipe
Do not push a fitting onto a pipe that is corroded, scratched, or deformed. Fix the pipe first.
Forgetting to Support the Plumbing
Pipe movement can strain the connection. Support the plumbing properly so the fitting does not get pulled or bent.
Testing Too Quickly or Ignoring Small Leaks
Always check the connection after restoring water. Even a small leak should be dealt with immediately.
Tips for a Secure and Leak-Free SharkBite Connection
To improve your results, keep these simple tips in mind:
- Use the correct fitting for the pipe type and size.
- Make a clean, square cut every time.
- Keep the pipe surface clean and dry.
- Follow the insertion depth listed by the manufacturer.
- Do not force a fitting onto damaged pipe.
- Support the pipe so the connection is not under stress.
- Test the system gradually once the water is back on.
SharkBite Fittings vs. Traditional Plumbing Connections
FeatureSharkBite Push-to-ConnectTraditional Soldered Connection
Installation Push-to-connect Requires soldering
Special equipment Minimal Torch and soldering tools
DIY friendliness Generally easier Needs more skill
Installation time Usually quick Often slower
Disassembly Possible with release mechanism Usually requires cutting
Surface preparation Important Important
SharkBite fittings are convenient, especially for quick repairs. Traditional soldered joints may still be the better choice in some plumbing systems, depending on code, location, and project type.
Where Can You Use SharkBite Plumbing Fittings?
Plumbing Repairs
They are often used for certain repair jobs, especially when you need a fast replacement section.
Pipe Extensions
You can use them to join compatible pipe sections and extend a line.
Fixture Connections
They can help connect valves and adapters around plumbing fixtures.
Tight or Difficult Areas
Push-to-connect fittings can be very helpful in small spaces where soldering would be awkward. Still, you need enough access to install them correctly.
Safety and Installation Considerations
Before starting, always turn off the water and make sure the line is depressurized. Use cutting tools carefully and keep your hands clear.
Follow the product instructions closely. Do not use a fitting outside its rated application.
If the job involves concealed plumbing, main water lines, or unclear code requirements, it may be better to call a licensed plumber.
Troubleshooting SharkBite Fitting Problems
Why Is My SharkBite Fitting Leaking?
A leak may happen because of:
- Incomplete pipe insertion
- Damaged pipe
- Wrong fitting size
- Dirty pipe surface
- Poor pipe preparation
- Damaged fitting or seal
What Should I Do If the Fitting Does Not Push On?
Stop and check the pipe size, pipe condition, and alignment. Do not force the fitting.
What If the Connection Leaks After Installation?
Shut off the water, relieve pressure, remove the fitting, inspect the pipe, and reinstall with proper preparation.
Maintenance Tips for SharkBite Plumbing Connections
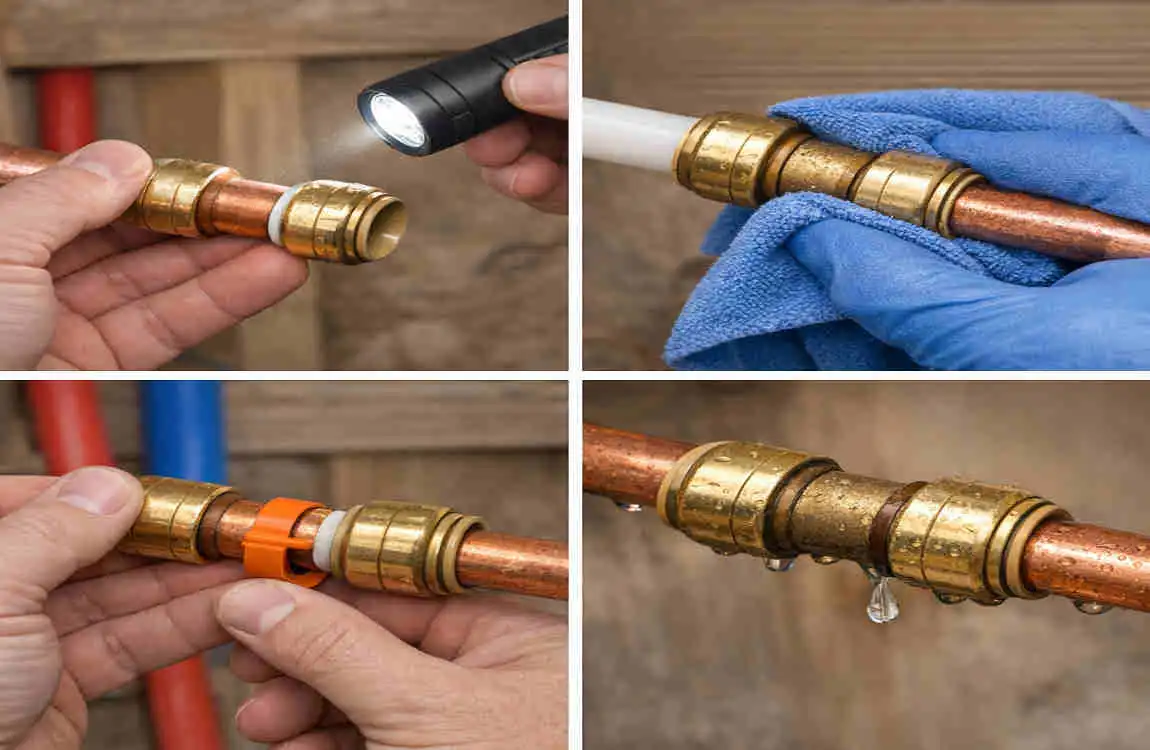
Inspect visible fittings from time to time. Look for moisture, mineral buildup, or movement around the connection.
If you notice a problem, deal with it early. A small issue is much easier to fix than a major leak.
Frequently Asked Questions About How to Use SharkBite Plumbing Fittings
How do you use SharkBite plumbing fittings?
Turn off the water, cut the pipe cleanly, deburr it, mark the insertion depth, and push the fitting onto the pipe until it seats fully. Then turn the water back on and check for leaks.
Do you need to use Teflon tape with SharkBite fittings?
Not on the push-to-connect part. Threaded parts may have different requirements, so check the instructions.
How far should a pipe go into a SharkBite fitting?
It should go in to the depth listed by the manufacturer. That is why marking the pipe is so useful.
Can SharkBite fittings be removed and reused?
Some can be removed, but reuse depends on the fitting’s condition and the manufacturer’s guidance.
Can SharkBite fittings be used on copper pipe?
Yes, if the fitting is rated for copper and the pipe is prepared correctly.
Can SharkBite fittings be used on PEX?
Yes, compatible fittings can be used on PEX when the size and product rating match.
How long do SharkBite fittings last?
That depends on the quality of the fitting, installation, water conditions, pressure, and application.
| Step | What to Do | Key Tip |
|---|---|---|
| Turn Off Water | Shut off the water supply before starting. | Open a faucet to release pressure. |
| Cut the Pipe | Cut the pipe cleanly and squarely. | Remove burrs and rough edges. |
| Mark the Depth | Mark the recommended insertion depth on the pipe. | This helps ensure a secure connection. |
| Insert the Fitting | Push the SharkBite fitting firmly onto the pipe. | Push until it reaches the marked depth. |
| Check the Connection | Gently pull the fitting to confirm it is locked. | The fitting should not slide off. |
| Turn Water On | Slowly restore the water supply. | Check carefully for leaks. |
| Test the Joint | Run water through the system and inspect the connection. | Fix any leak before regular use. |
