

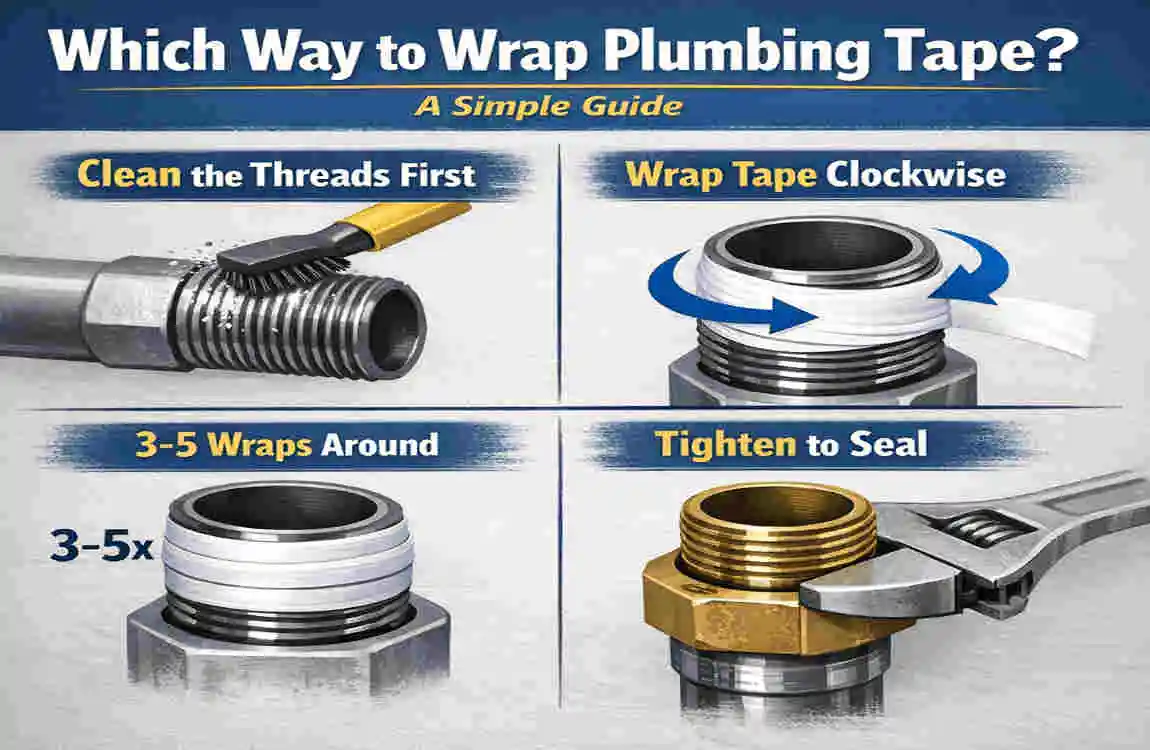
Plumbing tape is a thin white tape you wrap around threaded pipe connections before tightening them. You may also hear it called PTFE tape, thread seal tape, or plumber’s tape.
Its job is simple: it helps create a better seal between threaded parts so water or air does not leak out. It does not glue the joint together. Instead, it fills tiny gaps in the threads and helps the pieces fit more tightly.
That is why the tape matters. A small mistake with thread tape can lead to drips, leaks, or a loose connection later on.
Which Way to Wrap Plumbing Tape?
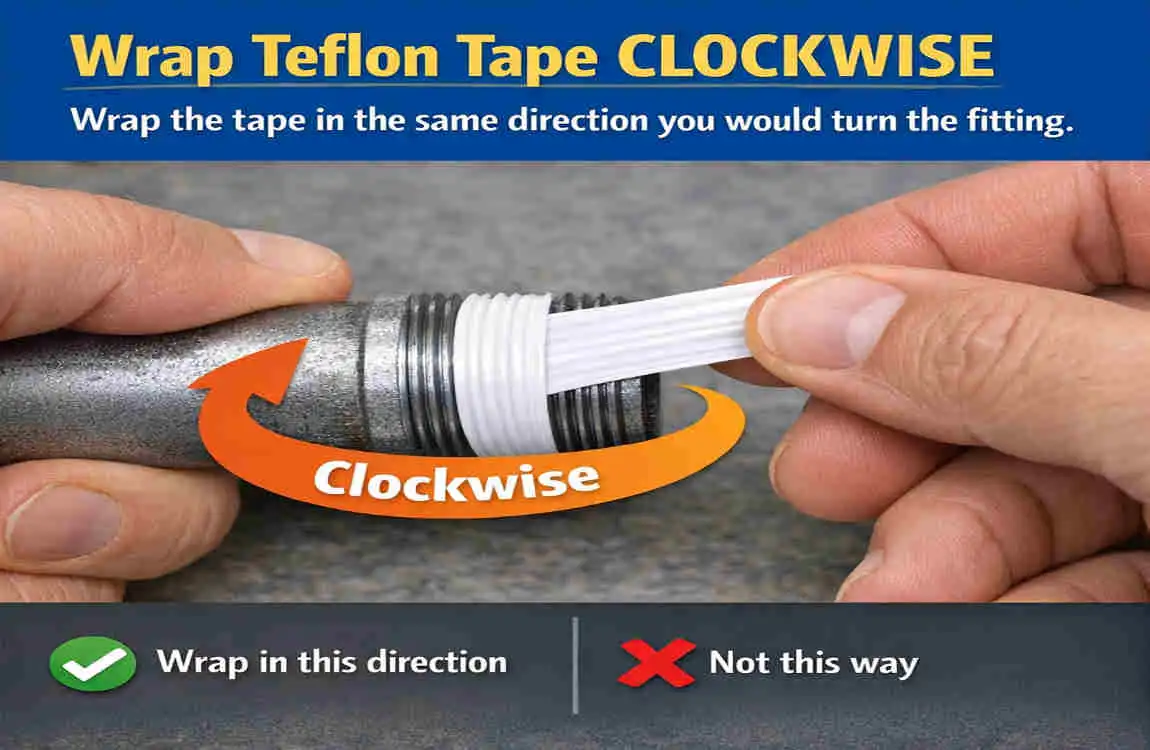
The correct answer is this: wrap plumbing tape in the same direction the fitting will turn when you tighten it.
For most standard threaded fittings, that means wrapping clockwise when you are looking at the end of the male threads.
Why this direction matters
When you tighten the fitting, the turning motion should press the tape into the threads instead of pulling it loose. If you wrap the tape the wrong way, the fitting can bunch it up or unwrap it as you tighten.
That can weaken the seal instead of strengthening it.
Simple visual guide
Correct direction for most fittings:
Wrap clockwise → tighten clockwise
Incorrect direction:
Wrap counterclockwise → tighten clockwise
Think of it this way: the tape should work with the threads, not against them.
A quick example
If you are holding the male pipe end and looking straight at the threads, wrap the tape to the right. Then when you screw the female fitting on, the tape stays in place and compresses nicely.
That is the standard answer to which way to wrap plumbing tape for most home plumbing jobs.
One small caution
Not every thread is the same. Some special fittings use left-hand threads, which tighten the opposite way. In those cases, the tape should follow the fitting’s tightening direction.
If you are unsure, check the fitting first before wrapping.
How to Wrap Plumbing Tape Correctly
Using plumbing tape is easy once you know the steps. The key is to keep the tape neat, tight, and in the right direction.
Step-by-step method
- Clean the threads
- Make sure the male threads are dry and free of dirt, grease, or old tape.
- Start slightly back from the end
- Don’t start right at the pipe opening. Leave the very edge clear.
- Hold the tape firmly
- Press the end of the tape against the threads with your thumb.
- Wrap in the correct direction
- For most fittings, wrap clockwise.
- Overlap slightly
- Each turn should cover part of the last one.
- Use enough layers
- Usually, a few wraps are enough. Do not make the threads bulky.
- Tear or cut the tape
- Press the loose end down to keep it in place.
- Tighten the fitting carefully
- Thread the connection on slowly and evenly.
Practical tips
A few small habits can make the job cleaner and easier:
- Keep tape off the pipe opening
- Pull the tape with steady tension
- Avoid wrinkles and loose edges
- Do not overdo the layers
- Make sure the tape sits flat in the threads
If the tape looks messy, it may not seal as well.
How much tape should you use?
There is no single perfect number for every connection. Some fittings need only a few wraps, while others may need a little more.
A good rule is to use enough tape to cover the threads without building up too much thickness. If you force the fitting or it feels too tight too fast, you may have used too much.
Common Mistakes When Using Plumbing Tape
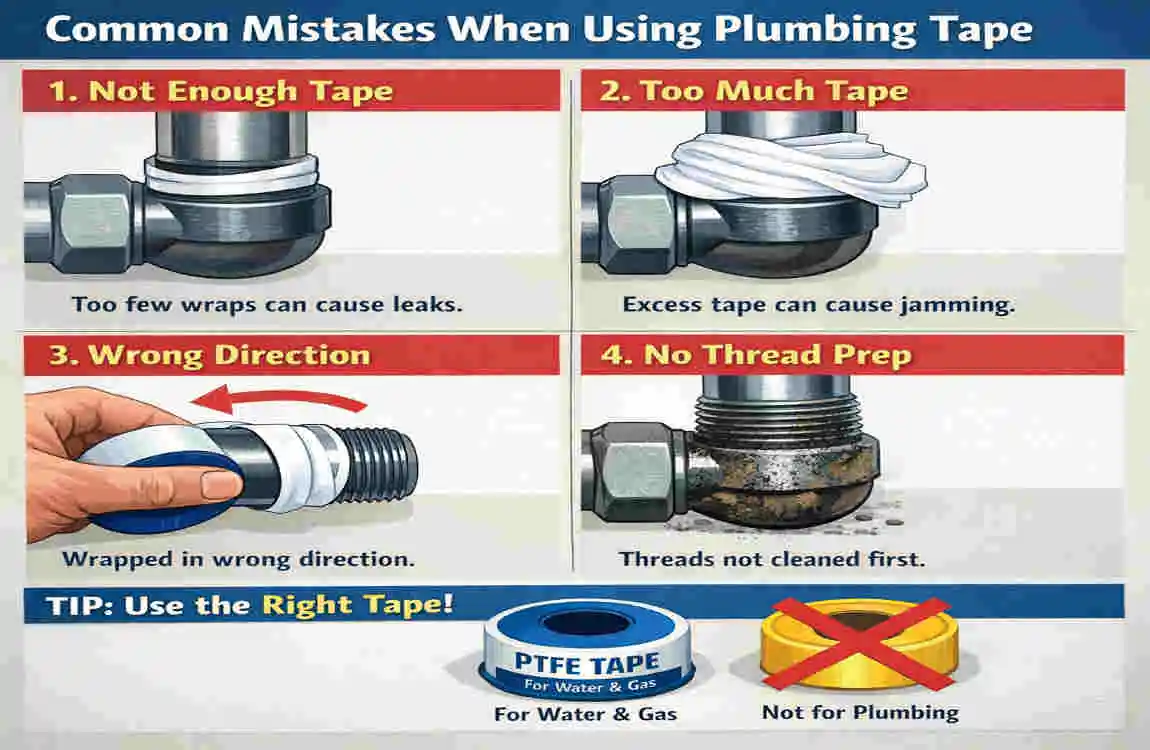
Many DIY leaks come from small tape mistakes. The good news is that most of them are easy to avoid.
Wrapping in the wrong direction
This is the most common mistake. If you wrap against the tightening direction, the tape may unwind as you install the fitting.
This weakens the seal and can cause leaks later.
Using too much tape
More tape is not always better. If you wrap on too much, the fitting may not thread on properly.
It can also create extra stress on the connection. The goal is a snug seal, not a packed joint.
Using too little tape
Too little tape can leave gaps in the threads. If the seal is incomplete, water or air may escape.
A light wrap may seem neat, but it might not do the job.
Wrapping dirty or damaged threads
Plumbing tape cannot fix bad threads. If the threads are damaged, rusted, or full of debris, the tape will not solve the real problem.
Clean the threads first. If they are badly worn, the fitting may need replacement.
Covering the pipe opening
Do not let tape hang over the end of the pipe. Loose tape can break off and get into the line.
That can cause a blockage or end up in valves and fixtures where it does not belong.
Using tape where a washer or O-ring should seal
Some fittings are designed to seal with a washer, rubber gasket, or O-ring. Those connections do not need thread tape.
If you add tape anyway, it may not help and could even prevent the parts from seating correctly.
Over-tightening after taping
Tape helps seal the threads, but it does not replace proper tightening. At the same time, do not force the fitting too hard.
Over-tightening can crack fittings, strip threads, or damage the seal.
Where Should You Use PTFE Plumbing Tape?
PTFE tape works well in many threaded plumbing jobs, but not all.
Good uses for plumbing tape
You can usually use it on:
- Water supply connections
- Showerheads
- Faucet adapters
- Threaded pipe joints
- Some air line fittings
These are the kinds of connections where threads need help sealing.
Gas-line applications
Gas connections are different. If a gas fitting allows thread tape, use the correct tape rated for gas service.
Always follow the product instructions, local codes, and manufacturer requirements. Gas work is not the place to guess.
Where plumbing tape should not be used
Do not use PTFE tape on every connection. It is usually not needed for:
- Compression fittings
- Joints sealed by washers
- O-ring connections
- Some quick-connect fittings
If a fitting already seals in another way, thread tape may not help.
Plumbing Tape vs. Pipe Thread Sealant: Which Is Better?
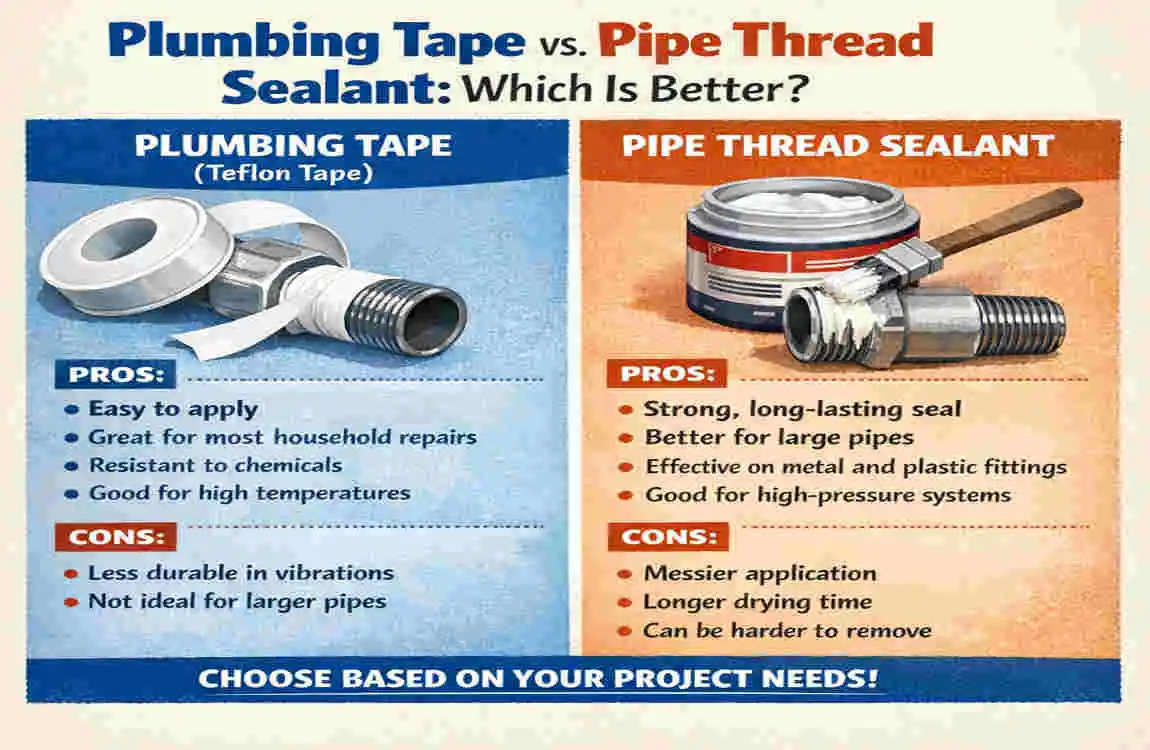
Plumbing tape and pipe thread sealant both seal threaded joints, but they aren’t the same.
PTFE tape is dry, clean, and quick to use. Pipe thread sealant, sometimes called pipe dope, is a liquid or paste that you brush or apply to the threads.
When tape is a good choice
Tape is often the easiest option for simple threaded fittings. It is clean, fast, and familiar to most DIY homeowners.
If the connection is standard and the manufacturer allows PTFE tape, it is often a practical choice.
When sealant may be better
Some jobs need a liquid or paste sealant instead of tape. This depends on pipe material, pressure, fluid type, and fitting design.
In those cases, follow the product instructions closely. Choose the option that matches the connection.
The main point
The real issue is not just tape vs. sealant. It is whether the product is compatible with the fitting and the system.
FAQ: Which Way to Wrap Plumbing Tape?
Should plumbing tape be wrapped clockwise or counterclockwise?
For most standard right-hand threads, wrap it clockwise when looking at the end of the male threads. That is the correct answer for most home plumbing jobs.
How many times should I wrap plumbing tape?
Use enough wraps to cover the threads without making the joint too thick. A few steady layers are usually better than one loose wrap or many bulky ones.
Can I wrap plumbing tape backward?
You can, but you should not. Wrapping against the tightening direction can cause the tape to bunch up or unwind when you tighten the fitting.
Should plumbing tape cover the end of the pipe?
No, it should usually stay back from the opening. Covering the end can cause the tape to tear off and enter the pipe.
Can plumbing tape stop a leaking pipe?
It can help seal a threaded fitting, but it cannot fix cracks, broken threads, or damaged parts. If the fitting itself is bad, you may need to repair or replace the part.
Is PTFE tape the same as plumber’s tape?
In plumbing, yes, people usually mean PTFE thread seal tape. But “plumber’s tape” can also refer to metal strapping used to hang pipes, so the meaning depends on context.
Can I use plumbing tape on every threaded fitting?
No. Some fittings seal with washers, O-rings, or gaskets instead of thread tape. Always check the fitting type first.
| Step | What to Do | Quick Tip |
|---|---|---|
| Clean the Threads | Remove dirt, grease, and old tape. | Threads should be dry and clean. |
| Choose the Direction | Wrap the tape clockwise when looking at the end of the male threads. | This matches the direction of tightening. |
| Start Correctly | Begin near the end of the fitting, leaving the first thread mostly uncovered. | Prevents tape from entering the pipe. |
| Wrap 3–5 Times | Overlap the tape slightly as you work toward the base. | Keep the tape smooth and snug. |
| Tear the Tape | Tear or cut it and press the end firmly onto the threads. | Avoid loose or hanging tape. |
