
Did you know that a high-quality metal roof can last 40 to 70 years? When you compare that to traditional asphalt shingles, which typically need replacing every 15 to 20 years, the winner is clear. If you are a homeowner looking to make a smart, long-term investment in your property, upgrading your roof is one of the best moves you can make.
More and more beginners are choosing to take on this project themselves. Why? Because metal roofs offer incredible benefits. They require very little maintenance, they are highly resistant to fire, and they actually reflect the sun’s heat. This “cool roofing” effect can significantly lower your summer air conditioning bills, which is a huge plus in 2026 as energy costs continue to rise.
If you are wondering how to attach metal roofing panels without hiring an expensive contractor, you are in the right place. You might think that roofing is a job only for seasoned professionals,
| Action | Key Tips | |
|---|---|---|
| Prepare roof deck and underlayment | Install synthetic underlayment and drip edge; ensure minimum 3:12 pitch | |
| Position first panel at eave | Overhang 1-2 inches; align square and fasten screws through flat areas only | |
| Overlap subsequent panels | Slide under previous panel by 1-2 ribs; apply sealant tape at overlap | |
| Fasten panels | Use #10-12 roofing screws with neoprene washers every 12-24 inches; avoid ribs at field | |
| Install ridge cap and trim | Add closure strips, butyl tape; screw ridge cap over panel ends | |
| Seal penetrations and inspect | Flash vents/pipes; check for loose fasteners and test with water |
Essential Tools and Materials for the Job
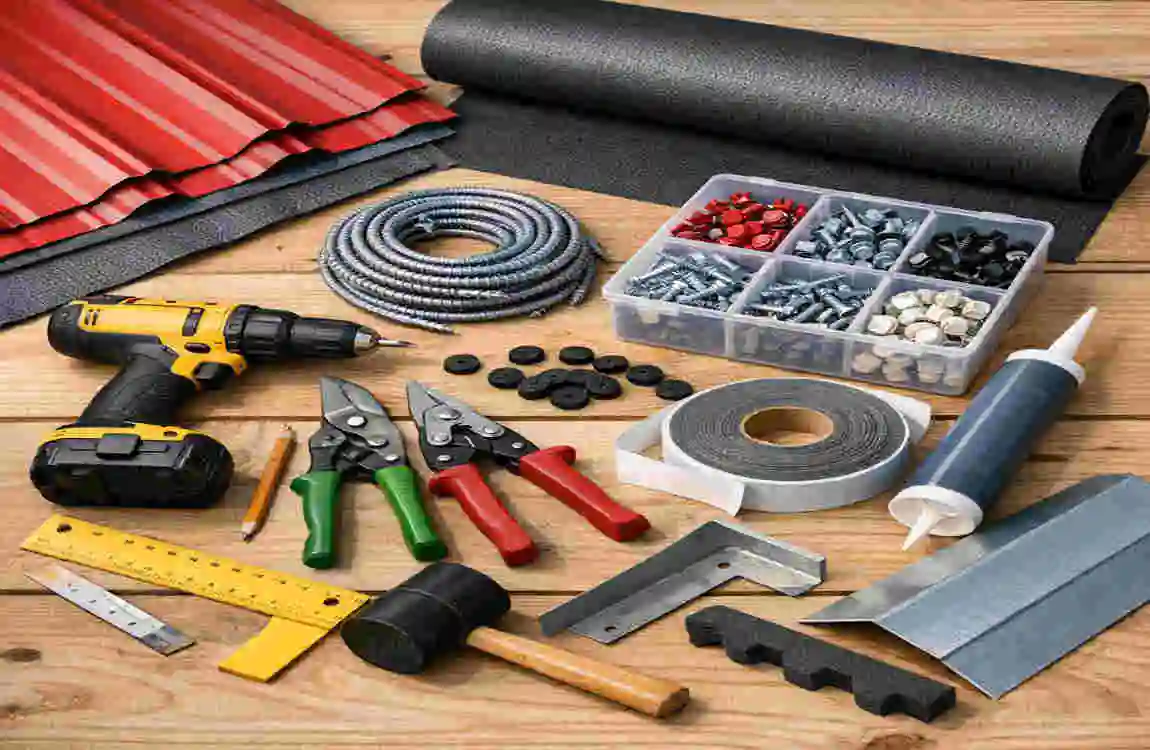
Before you climb that ladder, make sure you have the right gear. Trying to install a roof without the proper tools will only lead to frustration, wasted money, and potential leaks.
When figuring out how to attach metal roofing panels, you must prioritize both efficiency and safety. Below is a simple, scannable table that breaks down exactly what you need to get the job done right.
CategoryEssential ItemsThe Purpose of the Item
Hand & Power Tools Metal shears (or nibblers), power drill, chalk line, tape measure, heavy-duty safety harness Cutting panels cleanly, driving screws, keeping straight lines, measuring, and preventing dangerous falls.
Specialty Fasteners 1.5-inch metal roofing screws with rubber neoprene washers, double-sided butyl tape Securing the heavy panels to the wood deck below without allowing any rainwater to leak through the holes.
Roofing Materials Synthetic underlayment, metal drip edge, foam closure strips, corrugated or 5-rib metal panels Waterproofing the wood, directing water off the edges, sealing the gaps against bugs, and providing the main roof cover.
Safety Always Comes First
Please, do not skip your safety gear. Metal panels have razor-sharp edges right out of the factory. You absolutely must wear thick, cut-resistant gloves at all times. You should also wear protective safety goggles, especially when cutting panels or drilling screws, to keep tiny metal shavings out of your eyes.
Furthermore, walking on a slanted roof is dangerous. Add in the smooth, slippery surface of a metal panel, and the risk of slipping goes way up. Invest in a proper safety harness and tie yourself off to a secure anchor point on the roof. Your safety is worth far more than the cost of a harness.
Crucial Preparation Steps
You cannot just toss metal panels onto a bare roof and start shooting screws. The preparation phase is arguably the most important part of learning how to attach metal roofing panels. If the foundation is bad, the final product will be bad.
First, you need to assess your roof’s slope, also known as its pitch. Metal panels generally require a minimum pitch of 3:12. In simple, everyday language, this means the roof must drop 3 inches downward for every 12 inches of length. If your roof is flatter than this, water will not run off fast enough, and it will pool and leak through the seams.
Next, decide if you are removing the old roof. While you can install metal over old asphalt shingles, it is highly recommended to strip the roof down to the bare wood sheathing. This allows you to inspect the wood for hidden rot and fix it before it becomes a nightmare.
Once you have a clean wooden deck, follow these bulleted preparation steps:
- Roll out the underlayment: Cover the bare wood with a high-quality synthetic underlayment. Think of this as a waterproof blanket for your house. Also, apply an ice-and-water shield barrier along the bottom edges if you live in a cold climate to prevent winter leaks.
- Install your drip edge and eave trim: These are long, bent metal pieces that sit along the very bottom edge of the roof. They guide the rainwater directly into your gutters, keeping it away from your home’s wooden framing.
- Snap your chalk lines: Use a dusty chalk line string to snap perfectly straight, square lines across the roof. Use these lines to ensure your panels go on perfectly straight.
- Measure twice, order once: Measure your total roof square footage and always add 10% extra to account for mistakes, overlaps, and off-cuts.
A quick reminder on the rules: Always check with your local city or county building department before you start pulling shingles off. You need to ensure you are complying with local building codes and that you have the proper permits. Skipping this step can lead to hefty fines!
Step-by-Step Installation Guide
Now comes the fun part. You have prepared the surface, and you are ready to bring your home’s new crown to life. We have broken this process down into six simple, highly detailed steps.
Position Your Very First Panel
The very first panel you lay down will dictate how the rest of the roof looks. If panel number one is slightly crooked, panel number twenty will be miles off target.
Start at the bottom corner of your roof, known as the eave corner. Carefully lift your first metal panel into place. You do not want the panel to sit perfectly flush with the bottom edge of the roof; instead, you want it to overhang the edge by about 1 to 2 inches. This small overhang ensures that rainwater drips cleanly off the roof and into your gutters, rather than running down the side of your house.
Use your chalk lines to ensure the panel is perfectly square. Once you are perfectly aligned, it is time to fasten it. Drive your roofing screws through the panel’s flats. The “flat” is the smooth, flat part of the metal that rests directly against the wood below, not the raised bump (the rib). Screwing into the flat gives the screw a solid bite into the wood decking.
Overlap and Attach Subsequent Panels
With your first panel locked down tightly, you are ready to move across the roof. Grab your second panel and bring it up to the first one.
You must overlap the panels’ edges to keep water out. Depending on the exact style of metal you bought, you will typically overlap them by 1 to 2 raised ribs. Before you lay the second panel completely down over the first, run a strip of double-sided butyl sealant tape along the entire length of the overlapping rib. This sticky rubber tape creates an impenetrable waterproof seal between the two pieces of metal.
Press the second panel firmly down onto the sealant tape. Now, grab your drill. You will want to drive a screw every 12 to 24 inches along the edge, strictly following the manufacturer’s spacing guidelines. Repeat this overlapping and screwing process until you reach the far side of the roof.
Install the Ridge Cap and Trim
You have covered the main flat sections of the roof, but you now have a gap at the very top of the roof where the two sides meet. This peak is called the ridge.
To finish this off, you need to install a ridge cap. But before you screw down the metal cap, you must insert foam closure strips. These are pieces of dense, squishy foam that are cut to exactly match the wavy shape of your metal panels. You lay these strips across the top of the panels at the peak. They fill in the gaps created by the raised ribs, stopping wind-blown rain, bats, and buzzing insects from getting into your attic.
Once the foam strips are down, lay your V-shaped metal ridge cap over the top of them. Fasten the cap by driving screws through the overlapping metal and straight down into the raised ribs below. Finally, add your rake and gable trim to the outer side edges of your roof to give it a clean, finished, professional look.
Secure the Field Fasteners
Now that the panels are aligned and the edges are trimmed, make sure the middle sections of your metal panels are fully secured to the roof deck. The middle area of the panel is called the field.
When securing the field fasteners, you should follow a specific pattern. At the very bottom edge (the eaves) and the very top edge (the ridge), you want to put a screw next to every single raised rib. The edges of the roof take the most abuse from heavy winds, so they need extra holding power. In the middle field of the panel, you can generally space your screws out, placing one every 24 inches.
Pay close attention to this tip: Do not overtighten your screws! The screws come with a small rubber washer attached. You want to tighten the screw just enough so the rubber squishes slightly, forming a tiny umbrella to block water. If you drill too hard, the rubber will split and tear, creating a tiny bowl that holds water, invites rust, and leaks.
Flash Your Roof Penetrations
Unless you are building a simple shed, your roof will likely have protrusions. You likely have plumbing vent pipes, a chimney, or an exhaust fan. These are called roof penetrations, and they are the number one cause of roof leaks if they are not handled correctly.
When you reach a pipe, you must carefully measure and cut a hole in your metal panel to slide it down over the pipe. You can use your metal shears to cut this circle.
Once the panel is over the pipe, you need to seal it. You will use a flexible rubber sleeve called a pipe boot. You slide this rubber boot tightly down the pipe until the flat base of the boot rests against the metal roof. Seal the underside of the boot with a heavy bead of roofing silicone caulk, and then screw the base of the boot directly into the metal panel.
Perform a Thorough Final Inspection
You have driven your last screw, but you are not quite done yet. You need to perform a final, meticulous inspection of your handiwork.
Walk the entire roof slowly. Check every single screw. Did you miss any? Are there any screws sitting crooked? Are any rubber washers split from being driven too hard? Replace any bad screws immediately. Look for any tiny gaps near your trim and seal them with roofing caulk.
Next, grab a soft-bristle broom and gently sweep the entire roof. When you drive screws into metal, it creates tiny curly metal shavings known as “swarf.” If you leave these shavings on the roof, the next time it rains, they will rust and leave ugly orange streaks all over your brand-new panels.
Finally, grab your garden hose. Have a friend stand in the attic with a flashlight. At the same time, you spray water heavily onto the roof, focusing on the overlapping seams and the pipe boots. If your friend sees a drip, you know exactly where you need to add a little more sealant!
Common Mistakes Beginners Must Avoid
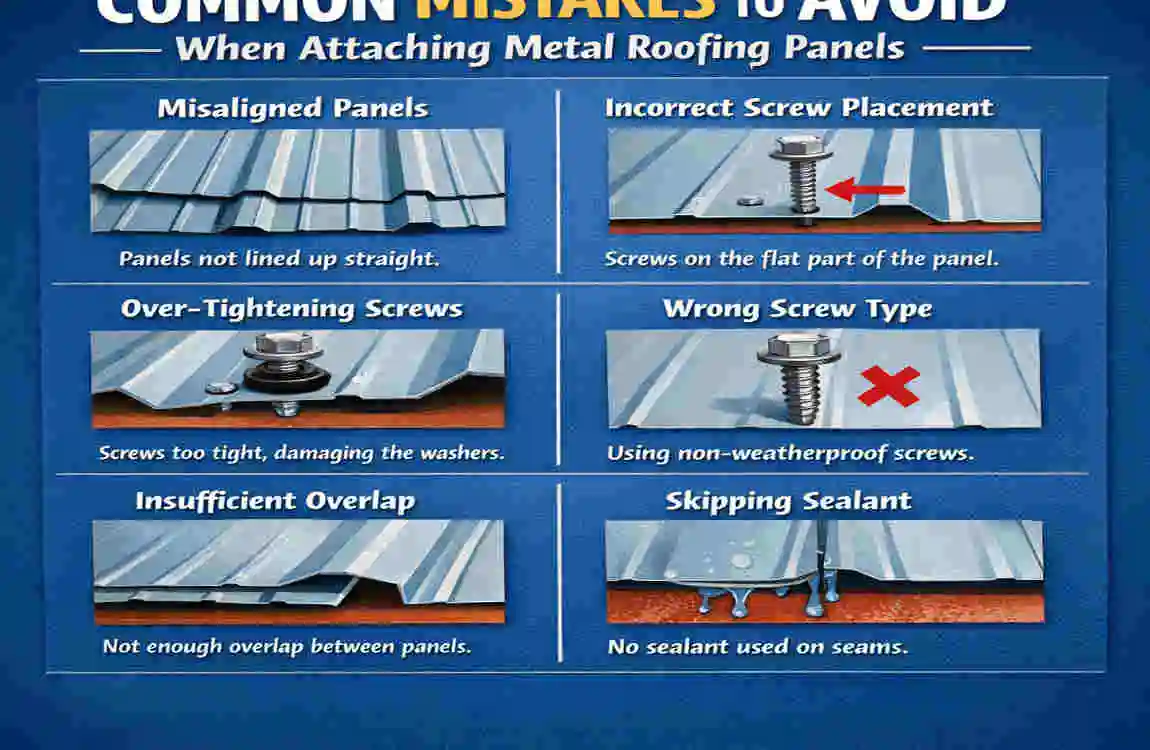
Learning how to attach metal roofing panels is all about knowing what not to do. Many beginners make simple mistakes that cost them thousands of dollars in water-damage repairs. Keep your eyes open for these major pitfalls.
Avoid these common blunders:
- Placing screws in the wrong spot: As mentioned, modern exposed-fastener roofs require you to screw into the flat part of the panel, not the raised rib. Screwing into the rib means the screw has nothing to grip but empty air before it hits the wood, making it weak and wobbly.
- Creating poor overlaps: If you do not overlap the panels correctly or forget to use your sticky butyl tape between the seams, water will eventually find its way in. Wind can actually push rain sideways, forcing it up and under loose panels.
- Over-tightening your fasteners: We cannot say this enough. If you crush the rubber neoprene washer by drilling too hard, it will fail. The screw should sit flat and snug, not buried into the metal.
- Ignoring expansion gaps: Metal is a living, breathing material. When the hot summer sun hits your roof, the metal will expand. When the winter freeze comes, it will contract. If you push your panels too tightly against a wall or a chimney, without leaving a tiny gap for movement, they will warp, buckle, and bend out of shape.
- Using the wrong cutting tools: Do not use an abrasive abrasive saw or a grinder to cut your metal panels. These high-speed tools melt the protective coating off the metal, ensuring the cut edge rusts within a matter of months. Stick to cold-cutting tools, such as metal shears or electric nibblers.
The True Cost Breakdown of DIY Metal Roofing
One of the biggest reasons you are likely reading this is to save money. Putting in the sweat equity and doing the labor yourself keeps a massive amount of cash in your pocket.
Let us look at a basic breakdown of what you can expect to pay for the materials to build your roof in 2026.
Material ItemAverage Cost (per square foot)
Standard Metal Panels $5.00 to $10.00
Fasteners, Trim, & Sealants $1.00 to $2.00
Total DIY Cost $6.00 to $12.00
Now, let us compare that to hiring a crew. If you hire professional roofing contractors to supply the materials and do the labor, the average cost usually starts at $15.00 per square foot. It can easily exceed $20.00 per square foot depending on where you live.
By taking on this project yourself, you are cutting out the massive labor markup. For a standard 2,000-square-foot roof, choosing the DIY route could easily save you $10,000 to $15,000. That is a life-changing amount of money saved just by being willing to learn a new skill!
Frequently Asked Questions
Even with a detailed step-by-step guide, it is completely normal to have a few lingering questions. Here are the answers to the most common questions beginners ask when tackling metal roofing.
How many screws do I need per panel? A general rule of thumb is that you will need approximately 50 to 80 screws for every 100 square feet of roofing. Looking at a single panel, you will typically use one screw for every 12 to 24 inches along the length of the seams, and a screw at every flat section along the bottom eave. Always consult your specific manufacturer’s guide, as some panels require tighter spacing in high-wind areas.
Can a complete beginner actually DIY a metal roof? Yes, absolutely! While it is physically demanding work, the actual process of laying panels is quite straightforward. If you are comfortable working on a ladder, know how to use a power drill safely, and take the time to measure carefully, you can do this. Just ensure you take extreme safety precautions and never work on a roof alone.
Should I use an exposed-fastener roof or a standing-seam roof? If you are a DIY beginner, you should prioritize exposed-fastener panels (such as corrugated or ribbed metal). They are much cheaper, easier to handle, and simpler to install. “Standing seam” roofs hide screws completely, which gives them an incredibly sleek look. Still, they require highly specialized tools, complex folding techniques, and extensive professional experience to be installed correctly.