
When it comes to protecting the edges of your roof, fascia boards play a vital role. Traditionally, wood has been the go-to material, but it’s vulnerable to weather damage, pests, and rot. Enter metal fascia boards, which offer exceptional durability against rain, wind, and insects. They last decades longer than wood and maintain their appearance with minimal upkeep.
Why are so many homeowners searching for how to add a metal frame fascia board to their house? It’s simple: the project is beginner-friendly, takes about 2-3 days, and requires only basic tools. Plus, with home improvement trends on the rise—spurred by homeowners wanting to save on contractor fees—metal fascia installation has become a smart, cost-effective choice.
What is a Metal Frame Fascia Board?
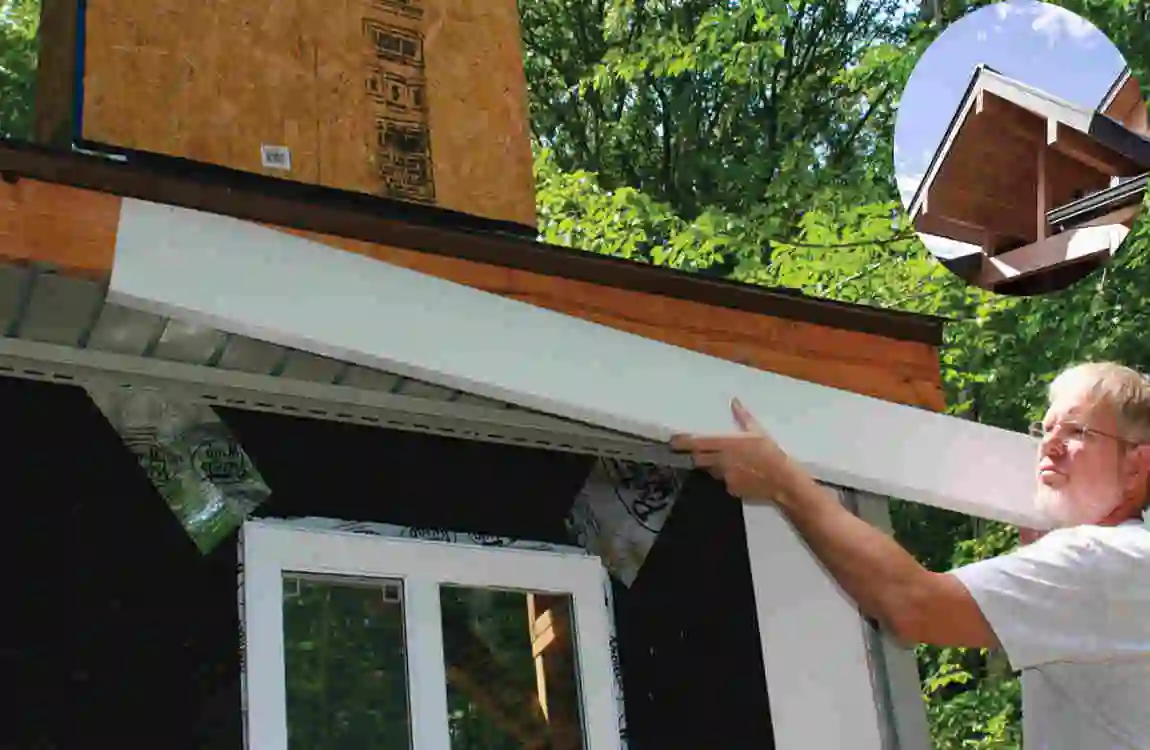
Before you start, it’s important to understand the basics. Fascia boards are the vertical trim pieces running along your roof edges. They serve two key purposes:
- Support your gutters to ensure proper water drainage.
- Hide the rafter tails for a clean, finished look.
Metal frame fascia boards are typically made of aluminum or steel, materials prized for their rust resistance and long lifespan—often 20 years or more without major repairs.
Compared to wood or vinyl, metal fascia holds up much better in harsh conditions. For example, in places with heavy monsoon rains like Lahore, wood fascia often warps or rots quickly, whereas metal stands strong and requires less frequent replacement.
If you’re aiming for a modern aesthetic with minimal maintenance, learning how to add a metal-frame fascia board to ato your house is the perfect solution. It not only enhances durability but also gives your luxury home a sleek, polished appearance.
Tools and Materials Needed
To get started, gather the right tools and materials. Here’s a quick breakdown to keep you organized:
CategoryItemsPurpose
Cutting Tin snips, hacksaw, trim metal panels precisely
Fastening 1.5″ galvanized screws, secure the frame to the rafters
Measuring tape, level, ensure straight, even alignment
Essential Materials
- Metal fascia panels (aluminum or steel)
- Framing lumber (2x4s for the underlying frame)
- Galvanized screws to prevent rust
- Caulk gun with silicone sealant for waterproof joints
- Safety gear like gloves and goggles
- Ladder sturdy enough to reach your roofline
Budget Tip
Expect to spend between $200 and $500, depending on your home’s size. For cost savings, check local suppliers such as Pakistan Steel Mills outlets, which often offer quality materials at competitive prices.
Preparation Steps
Proper preparation is crucial before you dive into installation. Follow these steps to set yourself up for success:
- Inspect existing fascia: Look for rot, cracks, or insect damage. Remove old boards carefully without damaging the roof or gutters.
- Measure your roofline: Accurately measure the length and overhang depth. These numbers will help you order the right amount of metal panels and lumber.
- Prep your workspace: Clear gutters and debris, secure your ladder on level ground, and cover plants or areas below to protect from falling debris.
- Weatherproof your work area: Avoid working in wet or windy conditions to ensure safety and material integrity.
Remember, before you learn how to add a metal frame fascia board to a house, proper prep prevents costly errors and delays.
Step-by-Step Installation Guide
Building the Frame
Start by constructing the frame that will hold your metal fascia. This step provides the backbone for a solid installation.
- Cut 2×4 lumber to fit the length of your rafters.
- Attach these horizontally under the eaves using lag screws for strong support.
- Space the framing pieces about 16 inches apart to maintain stability.
- Use a level to make sure the frame sits perfectly straight—this is essential for a neat finish.
Cutting and Fitting Metal Fascia
Now it’s time to handle the metal panels:
- Measure and cut panels with tin snips. Leave a small gap of about 1/8 inch to allow for metal expansion due to heat.
- Begin installation at one end of the roofline, overlapping seams by 2 inches to create a watertight seal.
- Secure panels to the frame with screws placed approximately every 12 inches.
- Pay close attention to alignment and tight fastening to avoid gaps or loose edges.
Precision is key when learning how to add a metal frame fascia board to ato a house to ensure longevity and appearance.
Installing Gutters and Finish
Once your fascia is in place, integrate the gutters:
- First, attach a drip edge flashing at the roofline to direct water away.
- Then, fix the fascia panels over the frame.
- Use silicone caulk on all seams and joints to keep moisture out.
- If you want, apply a UV-protective paint or finish to extend the metal’s lifespan and match your home’s color.
If you notice issues like wavy cuts or misaligned panels, gently loosen screws and adjust before tightening again.
Safety During Installation
Roof work requires caution:
- Always use a harness on steep roofs and work with a partner for added safety.
- Wear gloves to prevent cuts from sharp metal edges.
- Make sure your ladder is stable and grounded on firm ground.
- Take breaks and stay hydrated to avoid fatigue.
Safety is as important as skill when learning how to install a metal-framed fascia board on a house.
Common Mistakes to Avoid
Even experienced DIYers can slip up. Here are pitfalls to watch out for:
- Over-tightening screws can warp or dent metal panels.
- Ignoring the roof pitch angle causes improper water runoff and leaks.
- Skipping a primer coat on wooden frames leads to rust and rot.
- Poor panel overlap creates gaps where water can seep in.
By avoiding these issues, your metal fascia will remain durable and leak-free for years.
Maintenance and Longevity Tips
Keep your metal fascia looking and functioning great:
- Inspect annually for dents, loose screws, or damage.
- Clean debris from gutters and fascia quarterly to prevent blockages.
- Repaint metal every 5 years to maintain protection and reflect heat.
- In humid climates like Pakistan, apply anti-corrosive coatings to extend lifespan.
Proper maintenance can yield up to 30% energy savings by improving roof insulation efficiency.
Cost Breakdown and Savings

Choosing DIY over hiring professionals can save you a lot. Here’s a quick comparison for a typical 100-ft roofline:
ItemDIY CostPro Cost
Materials $400 $800
Labor $0 $1,200
Total $500 $2,000
By investing in tools (a $100 one-time fee) and roof materials, you avoid hefty labor costs and gain valuable skills.
FAQs
How long does it take to install a metal fascia board on a house?
Usually 1-2 days for a beginner, depending on roof size.
Can I install metal fascia on any roof type?
Yes, it works on most roof types, but ensure proper measurements.
What if I don’t have power tools?
Manual tin snips and hand drills work fine for small projects.
How often do I need to repaint metal fascia?
Every 5 years to maintain UV protection and prevent rust.
Is metal fascia noisy during rain?
Proper installation with insulation minimizes noise.