

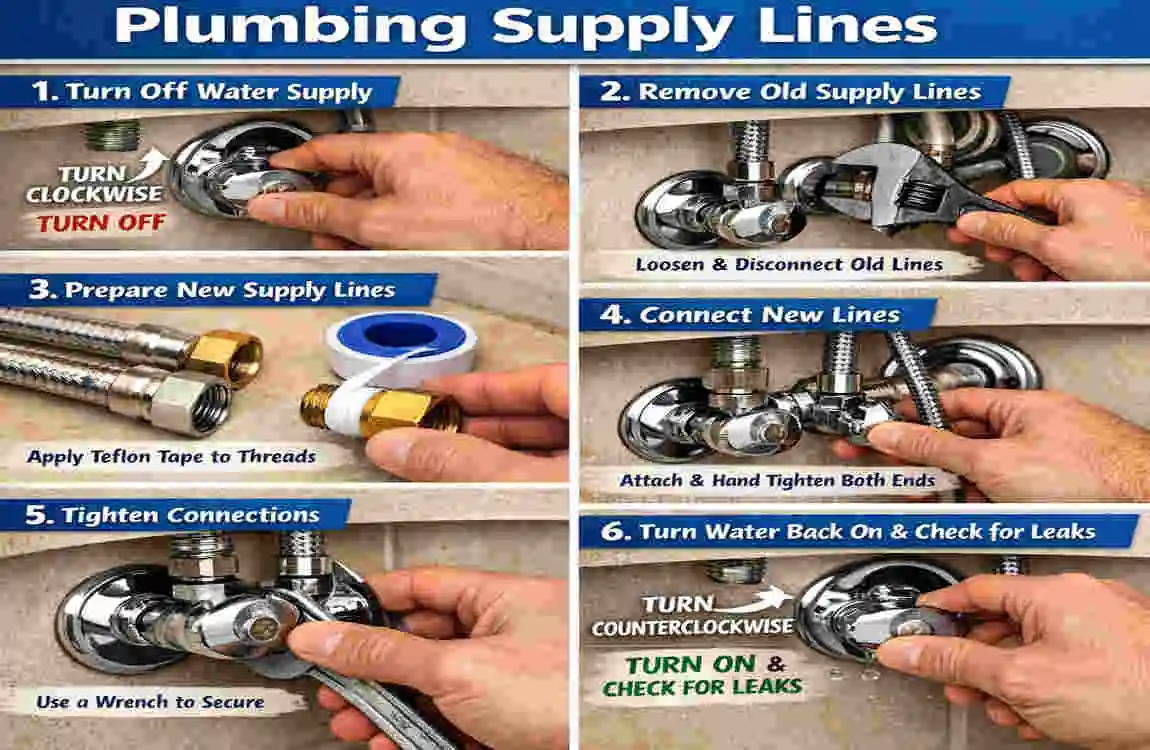
Plumbing supply lines may be small, but they do an important job. They carry clean water from the shutoff valve to fixtures like sinks, toilets, and water heaters. If a supply line becomes old, cracked, rusty, or loose, it can start leaking and cause water damage fast.
| Step | Short Information |
|---|---|
| Turn Off Water | Shut off the main water supply or fixture valve. |
| Remove Old Line | Disconnect the existing supply line carefully. |
| Check Connections | Inspect valves and fittings for damage or corrosion. |
| Measure New Line | Choose the correct length and compatible size. |
| Install New Line | Connect the new supply line securely to the valve and fixture. |
| Tighten Fittings | Hand-tighten first, then gently tighten with a wrench if needed. |
| Turn On Water | Slowly restore the water supply. |
| Check for Leaks | Inspect every connection and tighten slightly if necessary. |
If you are planning how to install new plumbing supply Lines at home, the good news is that many basic replacements are simple enough for a careful homeowner.
Why Plumbing Supply Lines Matter
Supply lines connect the water system to your fixtures. They work under pressure every day, so wear and tear is normal over time. A small leak can waste water and damage cabinets, floors, and walls.
That is why it helps to replace worn lines early instead of waiting for a bigger problem.
What Are Plumbing Supply Lines?
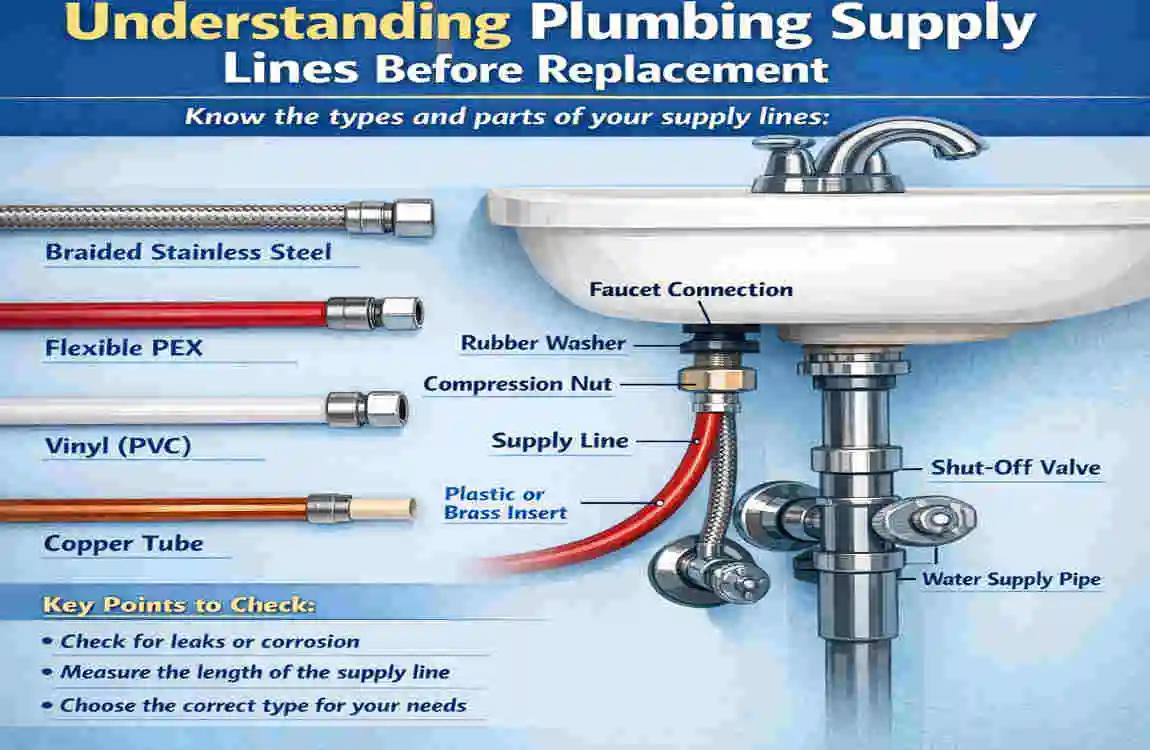
Plumbing supply lines deliver clean water to sinks, toilets, and other fixtures. They are different from drain pipes, which carry used water away. Supply lines must stay sealed and strong because they handle water pressure.
Common Types of Supply Lines
Here are the most common options:
- PEX: flexible, durable, and easy to work with
- Copper: strong and long-lasting, but less flexible
- CPVC: rigid plastic piping used in some homes
- Flexible braided lines: common under sinks and toilets
- Stainless-steel options: tough and corrosion-resistant
Signs It Is Time to Replace a Supply Line
Look for these warning signs:
- Visible leaks or dripping
- Rust, corrosion, or white buildup
- Cracks, bulges, or worn spots
- Low water pressure
- Discolored water
- Loose or damaged connections
If you notice any of these, replacing the line soon can help prevent bigger trouble later.
Choosing the Right Replacement Line
The right line depends on the fixture, pipe material, size, and water pressure. A flexible braided line works well in many sink and toilet setups. Rigid piping may be better in areas where you need a fixed line.
Always match the connection type and length carefully. A line that is too short may stretch, and one that is too long may bend or kink.
Tools and Materials You Will Need
Before you start, gather your tools and supplies.
Basic tools:
- Adjustable wrench
- Pipe cutter or tubing cutter
- Pliers
- Measuring tape
- Bucket and towels
- Screwdriver
Materials:
- New supply line
- Shutoff valve if needed
- Fittings or adapters
- Replacement washers or seals
- Thread seal tape where suitable
Safety First
Before doing any work, shut off the water supply. Open the faucet or fixture to release pressure. Place a bucket and towels underneath to catch leftover water.
If the plumbing is badly corroded, hard to reach, or already causing major water damage, stop and call a professional plumber.
How to Remove the Old Supply Line
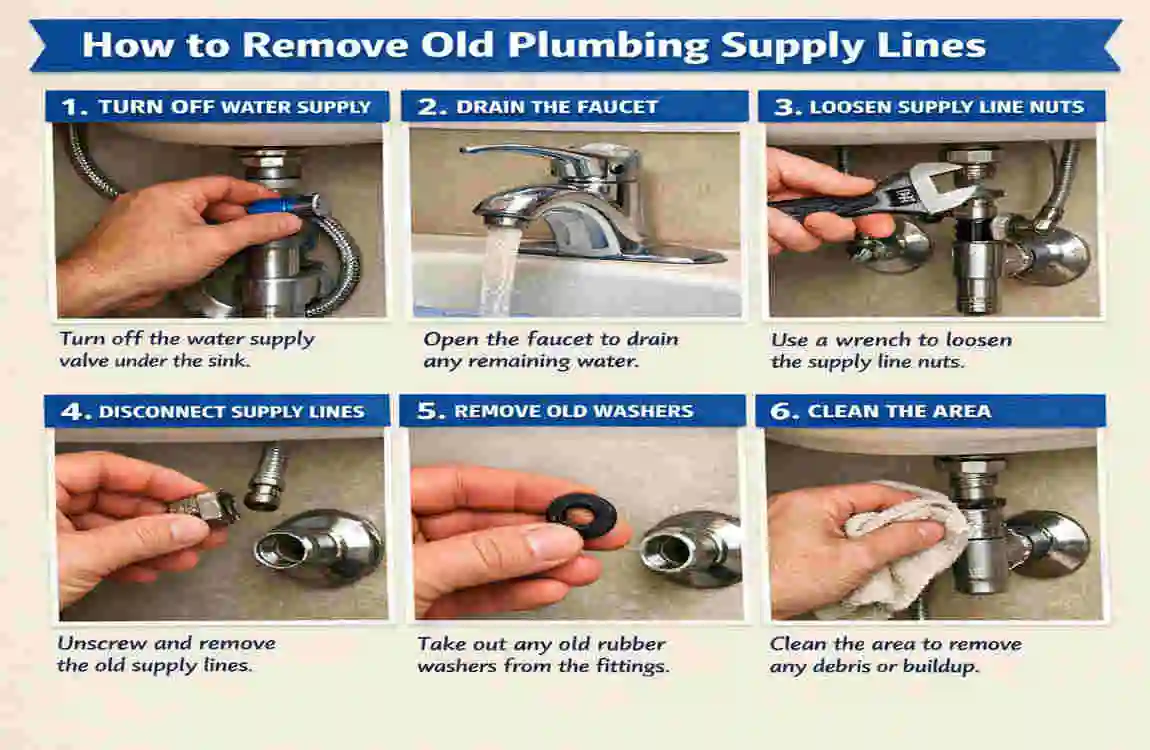
Shut Off the Water
Turn off the fixture valve or the main water supply. Then open the faucet to make sure the water has stopped completely.
Drain Remaining Water
A little water may still be trapped in the line. Let it drain into a bucket before disconnecting anything.
Disconnect the Old Line
Use the correct wrench and loosen the connections carefully. Do not force the fitting. Avoid damaging the valve or fixture.
Inspect the Connection Points
Check the valve, threads, and surrounding pipe for rust, cracks, or damage. Sometimes the leak is not only in the line but also in the valve or fitting.
How to Install New Plumbing Supply Lines at Home
Measure and Prepare the New Line
Measure the needed length before installing. Make sure the new line matches the old connection style and does not need to be stretched. Avoid twisting or bending it too sharply.
Connect the Supply Line to the Valve
Attach one end to the shutoff valve. Hand-tighten first, then use a wrench gently if needed. Do not overtighten, because that can damage the seal.
Connect the Other End to the Fixture
Attach the other end to the faucet, toilet, or other fixture. Make sure the washer is in the right place, and the connection sits straight.
Position the Line Carefully
Keep the line away from sharp edges, heat, and heavy pressure. Do not let it kink or press tightly against nearby objects.
Turn the Water On Slowly
Open the shutoff valve slowly. Watch each connection closely. If you see a drip, turn the water back off and check the fitting again.
Common Mistakes to Avoid
Here are a few problems that often happen during DIY installation:
Mistake | Why It Causes Trouble
Wrong line size Connection will not seal properly
Cross-threaded fitting Threads get damaged and leak
Overtightening Washer or fitting can break
Loose connection Water slowly drips out
Kinked line Water flow may reduce
Damaged washer Seal will not hold
How to Check for Leaks
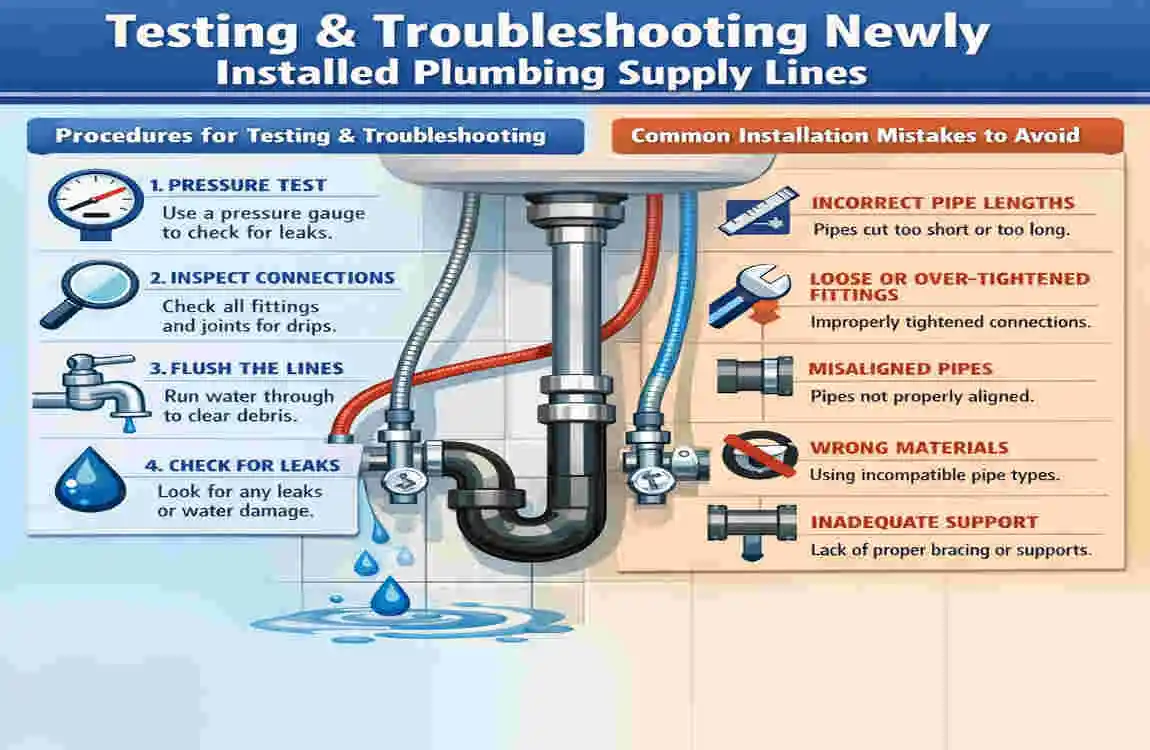
After turning the water back on, dry the area and watch it for a few minutes. Some leaks show up right away, while others take a little time.
Check again later the same day. A slow drip can be easy to miss at first.
How to Fix a Small Leak
If you notice a small leak, shut off the water before touching the connection again. Then inspect the washer, threads, and fitting. If a part is damaged, replace it instead of forcing the connection tighter.
A little extra tightening is not always the answer. In many cases, a worn seal is the real problem.
When You Should Call a Plumber
DIY repair is not always the best choice. Call a plumber if:
- The pipe is hidden or hard to reach
- There is heavy corrosion
- The shutoff valve is damaged
- You see major water damage
- The system has unusual pressure problems
- The replacement involves several supply lines at once
Simple Maintenance Tips
To help prevent future leaks, check visible supply lines from time to time. Keep the area dry and easy to reach. Replace old braided lines before they become brittle or worn.
Avoid storing heavy items against plumbing lines, and watch for early signs of moisture or corrosion.
FAQ
How do I install new plumbing supply lines at home?
Turn off the water, remove the old line, measure the new one, connect it carefully, and test for leaks.
Can I replace a plumbing supply line myself?
Yes, if the line is easy to reach and the fittings are in good shape.
What size plumbing supply line do I need?
Match the size to the fixture and valve connection.
How tight should the connection be?
Hand-tight plus a gentle wrench turn is usually enough. Do not overtighten.
Do I need plumber’s tape?
Sometimes, but only where the fitting type calls for it.
When should I call a professional?
Call one if the pipes are damaged, hidden, or leaking badly.
