
Adding a dormer to your home roof can be a game-changer, completely transforming your living space while enhancing your home’s overall aesthetic and functionality. Dormers not only bring in natural light but also maximize the utility of unused attic spaces. If you’re wondering how to add a dormer to a home roof.
What Is a Dormer?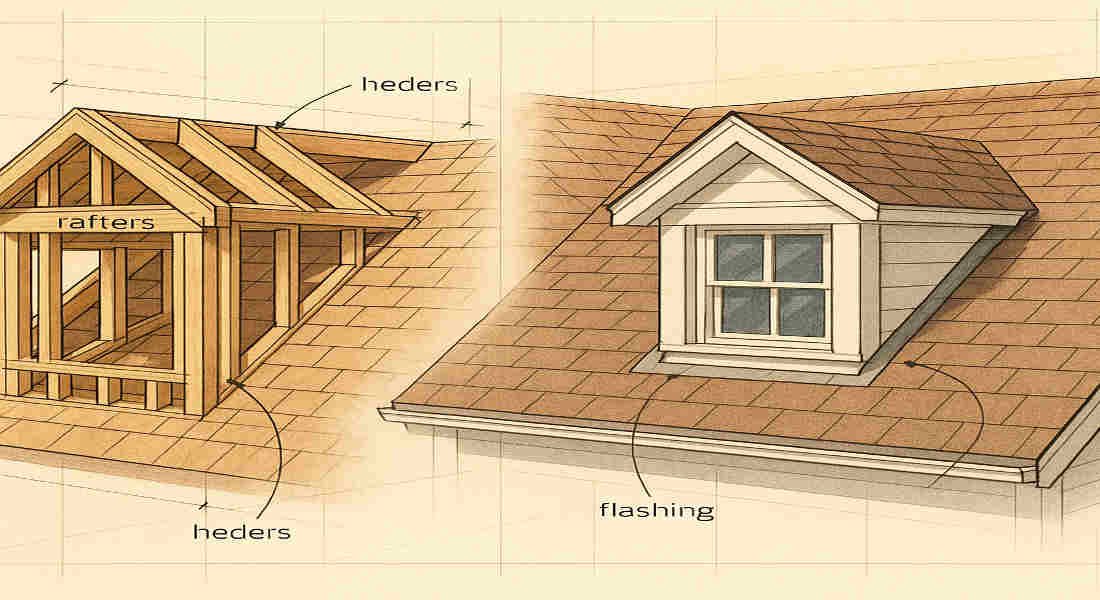
Definition and Architectural Significance
A dormer is a structural element that protrudes from a sloped roof, typically housing a window. Dormers are designed to increase usable space in the attic or upper level of a home. They also add architectural interest, creating a more dynamic and visually appealing roofline.
Dormers date back centuries and remain a common feature in many architectural styles, from colonial homes to modern builds. They’re as functional as they are decorative, making them a popular choice for home renovations.
Why Do Homeowners Add Dormers?
There are several practical and aesthetic reasons for adding dormers. Some of the most common include:
- Creating more space: Dormers convert attics into functional rooms, such as bedrooms, offices, or cozy reading nooks.
- Increasing natural light: Dormer windows flood interior spaces with sunlight.
- Enhancing curb appeal: A well-designed dormer can significantly improve the exterior appearance of your home.
- Boosting home value: With added space and improved aesthetics, dormers can increase your property’s resale value.
Types of Spaces Dormers Create
Dormers allow you to transform underutilized spaces into:
- Attic bedrooms: A dormer can make an attic livable by adding headroom and light.
- Home offices: Perfect for remote work, a dormer can create a quiet and functional workspace.
- Cozy nooks: Reading corners or small relaxation areas can be created with a smaller dormer addition.
Benefits of Adding a Dormer to Your Home Roof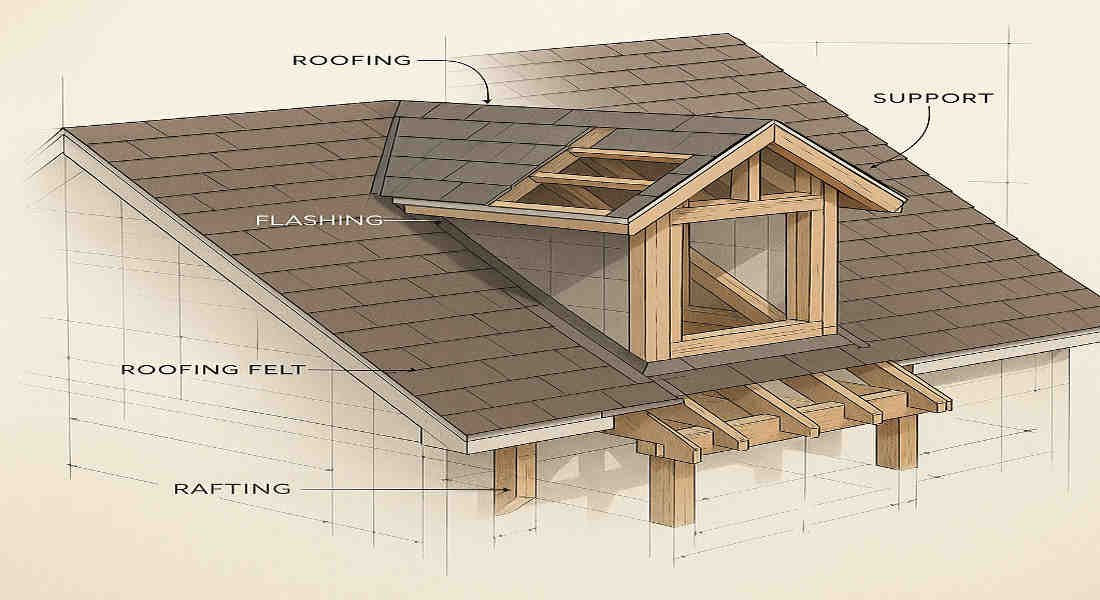
Increased Living Space
One of the most significant benefits of adding a dormer is the creation of a usable living space. By extending the roofline, a dormer makes sloped attic areas more accessible and functional without requiring a complete home addition.
Enhanced Natural Light and Ventilation
Dormers allow natural light to pour into dark and cramped attic spaces. They also improve airflow and ventilation, making the area more comfortable and energy-efficient.
Improved Curb Appeal
Dormers can significantly alter the appearance of your home from the outside. They add character and charm, making your property stand out in the neighborhood.
Better Energy Efficiency
By increasing natural light and ventilation, dormers can reduce their reliance on artificial lighting and cooling systems, ultimately lowering energy costs.
Maximizing Existing Space
Instead of building an entirely new room or extension, dormers make the most of your current square footage. This is a cost-effective solution for homeowners looking to expand.
Types of Dormers: Which Is Right for Your Home?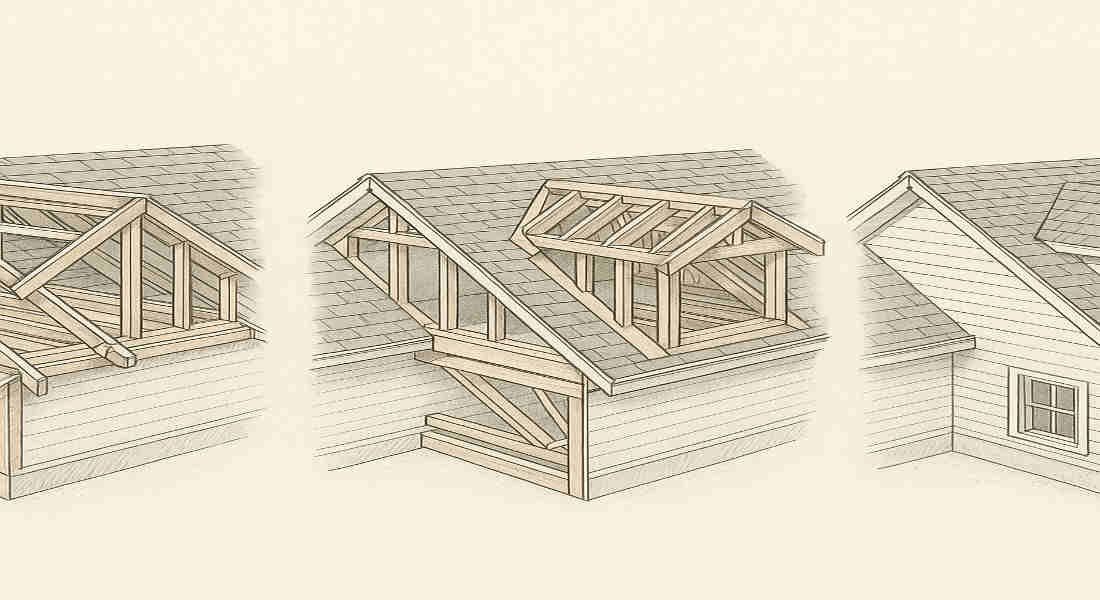
Choosing the right dormer style is essential to ensure it complements your home’s architecture and meets your functional needs. Here are the most common dormer types:
Gable Dormer
- Description: A triangular-shaped dormer with a pitched roof that matches the main roof.
- Pros: Classic design, ideal for traditional homes, allows for significant headroom.
- Cons: Requires more structural work, which can increase costs.
Shed Dormer
- Description: A dormer with a flat or slightly sloped roof that extends outward.
- Pros: Adds a lot of space and light, suitable for modern aesthetics.
- Cons: It can look bulky if not integrated well with the roofline.
Hip Dormer
- Description: A dormer with three sloping sides meeting at a ridge.
- Pros: Offers a softer, more elegant look, great for homes with complex rooflines.
- Cons: More difficult to construct, which can lead to increased labor costs.
Other Styles
- Eyebrow Dormer: Features a curved roof, adding a unique, whimsical look.
- Barrel Dormer: Features a rounded roof, adding visual interest.
- Flat Dormer: A simple, minimalist option for modern homes.
Matching Dormers to Your Home
To choose the right Dormer, consider your home’s architectural style, roof structure, and your personal preferences for space and light. A professional consultation can help you make the best choice.
You may also read (why is a survey important in home purchases).
Planning Your Dormer Addition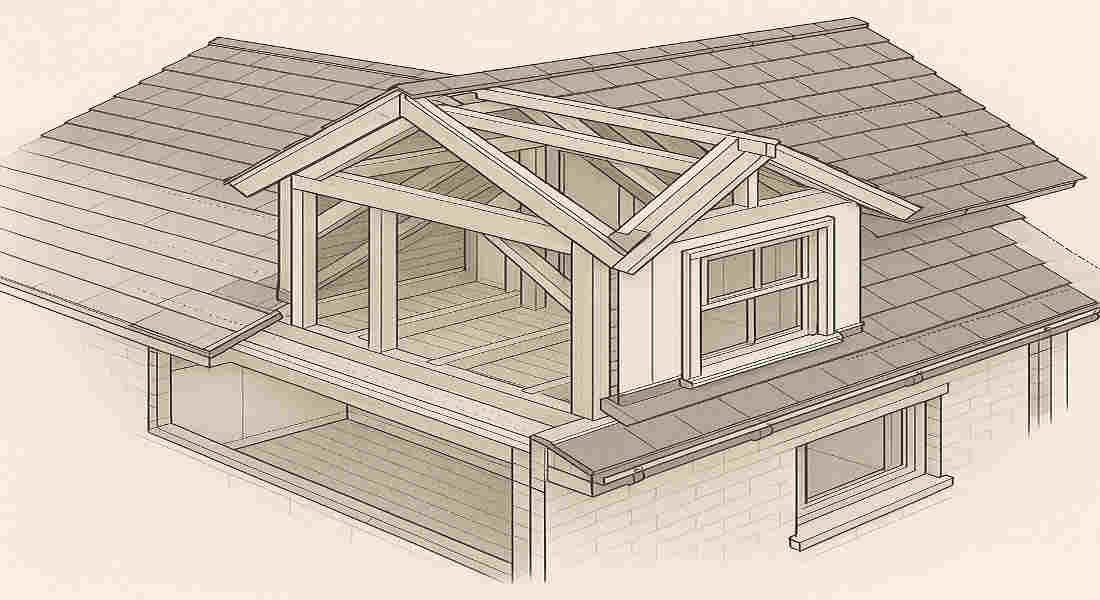
Assessing Your Goals
Before starting, identify the primary reason for adding a dormer. Are you looking to create more living space, improve your home’s lighting, or enhance it sits its exterior? Knowing your goals will guide your decisions.
Evaluating Feasibility
Hire a professional to assess your roof’s structural integrity and determine whether it can support a dormer. They will also evaluate the best placement for optimal results.
Understanding Building Codes and Permits
Every region has its own zoning laws and building codes, so it’s essential to check local regulations. You’ll likely need permits before beginning construction.
Budgeting for Your Project
Dormer additions can range from $10,000 to $50,000, depending on the size and style of the addition. Here’s a rough cost breakdown:
Dormer Type Average Cost Range
Gable Dormer $15,000 – $30,000
Shed Dormer $10,000 – $25,000
Hip Dormer $20,000 – $50,000
Timeline Expectations
Dormer projects typically take 4-8 weeks, depending on complexity and weather conditions. Plan accordingly to minimize disruptions.
Step-by-Step Guide: How to Add a Dormer to a Home Roof
Initial Consultation and Feasibility Assessment
Start by consulting a professional contractor or architect to determine whether your roof can support a dormer. Structural analysis ensures safety and compliance with building codes and regulations.
Design and Planning
Work with an architect to finalize the design and placement of your Dormer. Once plans are ready, secure the necessary permits for construction.
Preparing the Roof
- Remove roofing materials in the area where the Dormer will be added.
- Protect your home from the weather by installing temporary coverings.
Framing the Dormer
- Construct the dormer frame, including joists, studs, and rafters.
- Align the new structure with the existing roof to ensure stability.
Installing Roofing and Siding
- Add waterproofing materials and flashing to prevent leaks.
- Match the shingles and siding to your home’s exterior for a seamless look.
Interior Finishing
- Install insulation, drywall, and paint.
- Add windows and integrate the dormer space with the rest of your home.
Final Inspection and Cleanup
Ensure that the project complies with all applicable building codes and safety standards. Perform a walk-through to address any concerns.
DIY vs. Professional Dormer Installation
Risks of DIY
While it might be tempting to tackle dormer installation yourself, the process is complex and requires expertise. Mistakes can lead to structural issues, leaks, and costly repairs.
Benefits of Hiring a Professional
Professionals have the experience, tools, and knowledge to complete the project efficiently and safely. They can also ensure that the Dormer matches your home’s style and complies with local regulations.
You may also read (do roof turbines help cool your house).