
Plumbing is essential to any construction project — whether it’s a residential home, a multi-story building, or a commercial space. Yet, understanding the complexity of plumbing systems can be daunting. That’s where technical drawings like riser diagrams come into play.
Plumbing systems are far more than just pipes and fixtures; they are intricate networks designed to ensure the smooth Flow of water supply and waste. However, because these systems are hidden behind walls and floors, they require detailed technical drawings to plan, install, and maintain them effectively.
One such crucial drawing is the plumbing riser diagram. This vertical blueprint illustrates how water supply and waste flow between different floors in a building. Whether you’re a homeowner, contractor, or engineer, understanding these diagrams can help you ensure compliance, avoid costly mistakes, and communicate effectively with professionals.
Understanding the Basics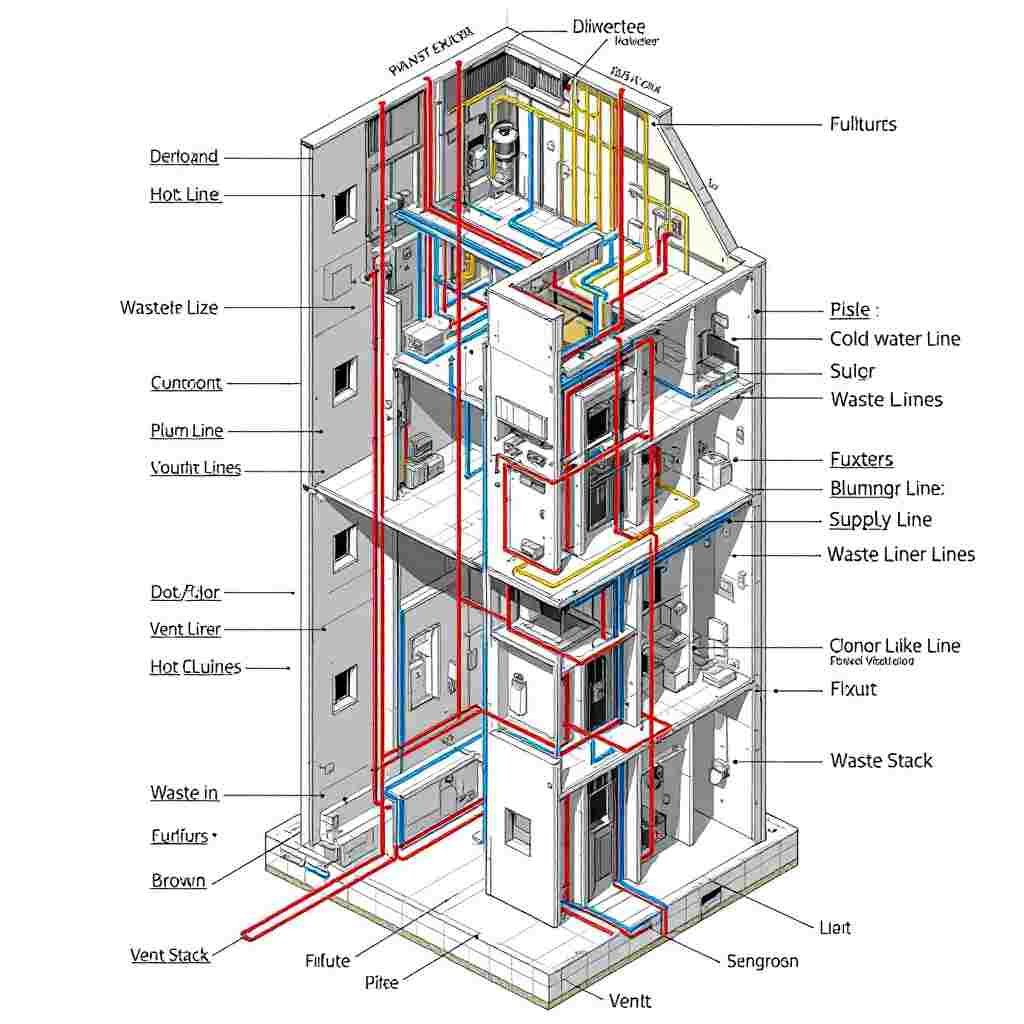
What Is a Riser Diagram in Plumbing?
A plumbing riser diagram is a vertical schematic representation of a building’s plumbing system. Unlike floor plans, which show a horizontal view of a single level, riser diagrams focus on the vertical layout, illustrating how pipes, fixtures, and other plumbing elements are connected across multiple floors.
Key aspects of a riser diagram include:
- Vertical pipes (risers) are the system’s backbone, transporting water or waste between floors.
- Fixtures and appliances: Sinks, toilets, showers, and water heaters are represented.
- Flow direction: The diagram shows how water flows in and out of the system.
Think of it as a roadmap for your plumbing system, showing the connections and Flow between different building parts.
Why Are Riser Diagrams Essential?
Riser diagrams are not just helpful; they’re often required for large-scale projects. Here’s why they’re so important:
- Ensuring Code Compliance and Safety Local building codes often require plumbing systems to adhere to strict guidelines. Riser diagrams help ensure compliance with these codes, reducing the risk of costly violations and ensuring safety.
- Streamlining Communication Riser diagrams are a common language between builders, plumbers, engineers, and inspectors. Clear visuals make it easier for everyone involved to stay on the same page.
- Preventing Mistakes Without a detailed diagram, pipe sizing, placement, or connection errors can occur. These mistakes can lead to leaks, water damage, or inefficient system performance. A riser diagram minimizes these risks.
- Saving Time and Money Proper planning with a riser diagram reduces the likelihood of rework, delays, or unexpected expenses during installation or repairs.
Key Components of a Plumbing Riser Diagram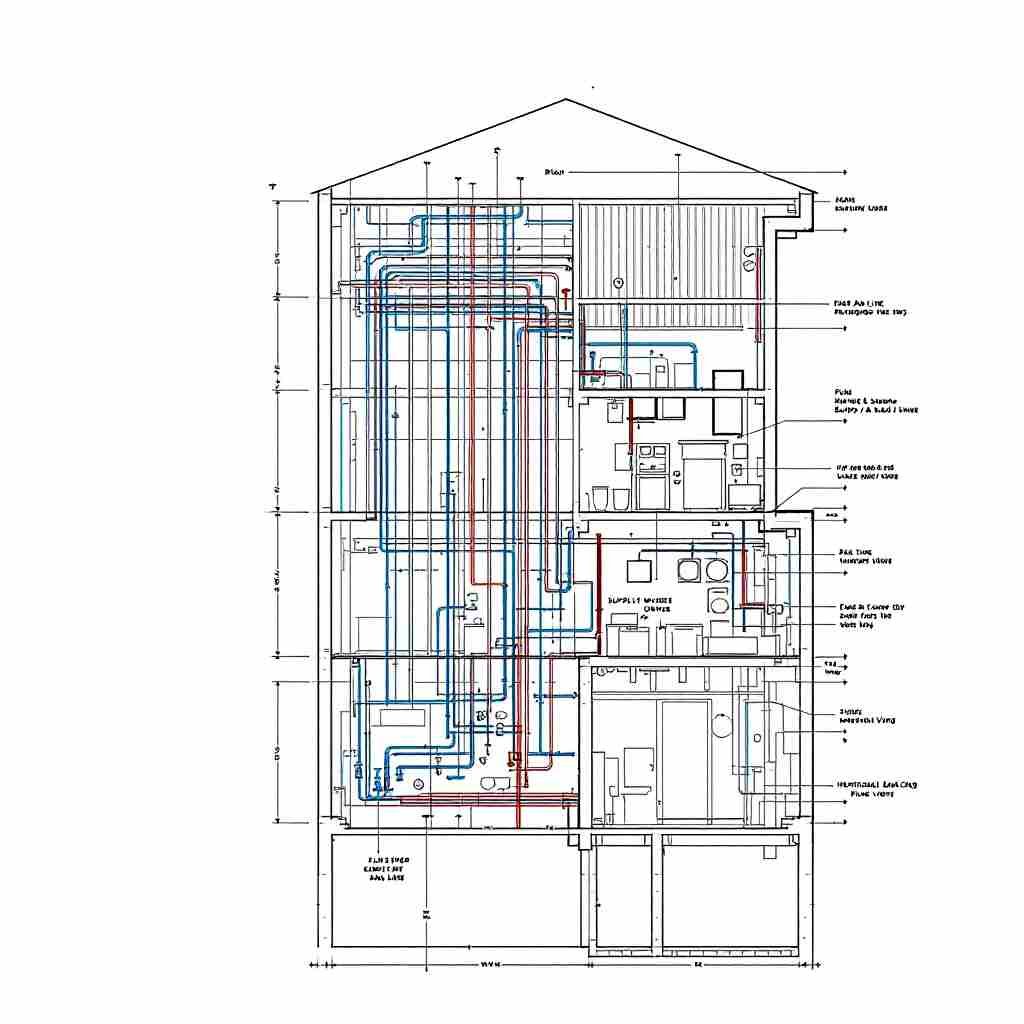
Understanding a riser diagram’s elements is crucial for reading and creating one. Let’s break down the key components:
You may also read (home plumbing system)
Vertical Pipes (Risers)
These pipes transport water (supply) or waste (drainage) between floors. In multi-story buildings, risers are the central arteries of the plumbing system. They’re often labeled to indicate their purpose, such as:
- Cold water riser
- Hot water riser
- Waste stack
- Vent stack
Fixtures and Appliances
Common plumbing fixtures and appliances are represented on the diagram, including:
- Sinks, toilets, and showers: Depicted with standard symbols.
- Water heaters: Marked to show their connection to the hot water supply.
- Laundry machines and dishwashers: Included when applicable.
Valves and Controls
Key components for managing water flow and pressure are shown, such as:
- Shut-off valves for stopping water flow.
- Pressure regulators to maintain safe water pressure levels.
- Backflow preventers to stop contaminated water from entering the clean water supply.
Pipe Sizes and Materials
Riser diagrams indicate pipe dimensions and materials like PVC, copper, or cast iron. This ensures the system is designed to handle the required flow capacity.
Symbols and Notations
Standardized symbols make it easy to interpret riser diagrams. For example:
- Arrows indicate flow direction.
- Dotted lines may represent vent pipes.
- Abbreviations like CW (cold water) or HW (hot water).
Connections and Flow Direction
The diagram shows how pipes are connected and the direction of water flow. This is especially critical for systems with complex layouts.
Types of Plumbing Riser Diagrams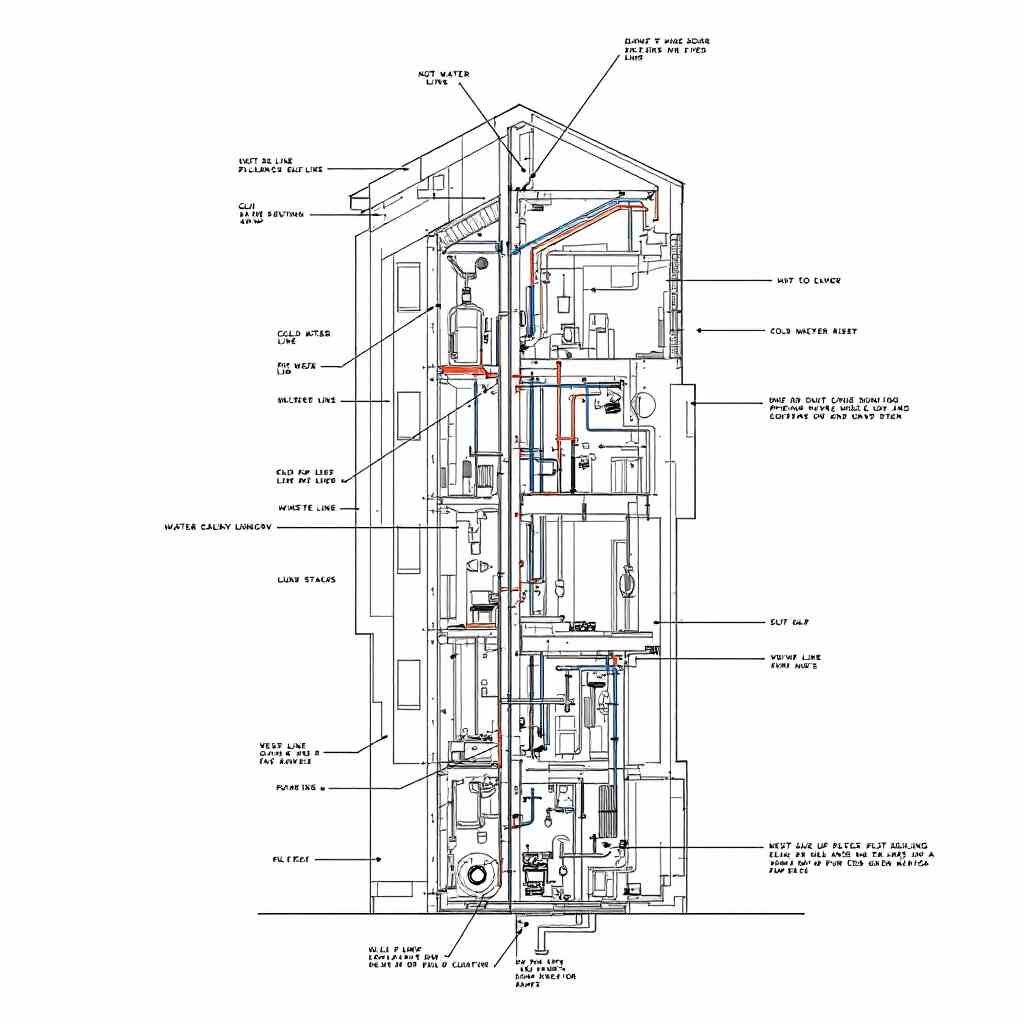
There are several types of riser diagrams, each serving a specific purpose:
Supply Riser Diagrams
These focus on the potable water supply system. They show how cold and hot water is distributed to fixtures across floors.
Waste and Vent Stack Diagrams
These diagrams illustrate the drainage and venting systems, ensuring proper waste disposal and preventing sewer gases from entering the building.
Combined Riser Diagrams
In some cases, the supply and waste systems are shown together in a single diagram for a comprehensive overview.
How to Read a Plumbing Riser Diagram
Reading a riser diagram may seem complex at first, but it becomes manageable with a step-by-step approach:
- Start with the Basics. Identify the building levels and their layout. Look at the diagram’s vertical orientation.
- Locate the Risers. Find the vertical pipes and note their labels (e.g., CW for cold water and HW for hot water).
- Understand the Symbols Refer to the symbol key to interpret fixtures, valves, and flow directions.
- Trace the Flow Follow the arrows to understand how water or waste moves through the system.
How to Create a Plumbing Riser Diagram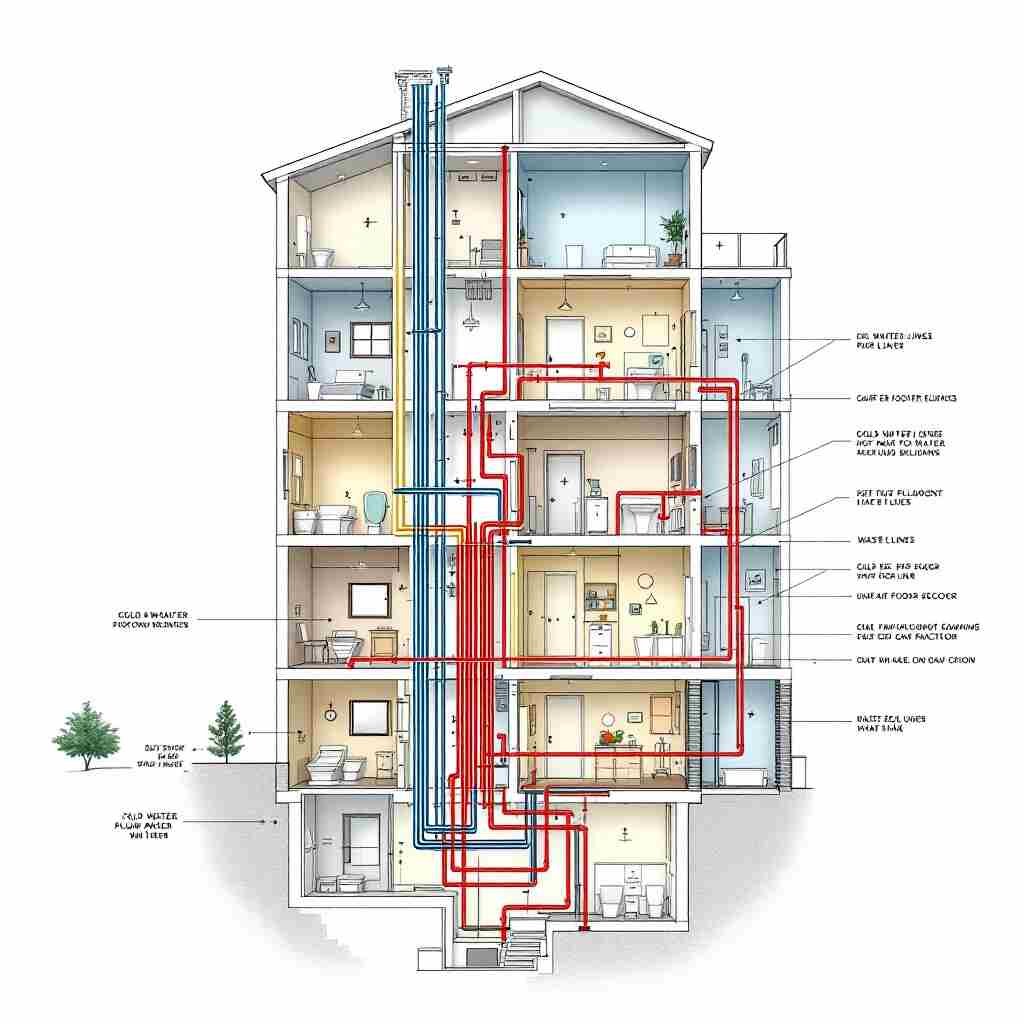
Creating a riser diagram involves careful planning and attention to detail:
Planning the Layout
Gather the building’s architectural plans and determine where fixtures and risers will be placed.
Selecting Symbols
Use standardized plumbing symbols to ensure clarity.
Drawing the Diagram
You can use tools like:
- Manual drafting: For small projects.
- Software tools: CAD programs or plumbing-specific design software for accuracy.
Labeling and Detailing
Clearly label pipe sizes, materials, and fixture types for easy interpretation.
Real-World Applications and Benefits
Residential Projects
For homeowners, riser diagrams simplify renovations or new builds by giving a clear picture of the plumbing system.
Commercial and Multi-Story Buildings
In larger structures, riser diagrams help manage complex systems spanning multiple floors.
Inspections and Permits
Inspectors often require riser diagrams to verify compliance with local codes.
Common Mistakes and How to Avoid Them
Here are some common mistakes in riser diagrams and how to avoid them:
- Omitting Fixtures: Double-check that all fixtures are included.
- Incorrect Pipe Sizing: Verify calculations for flow capacity.
- Unclear Symbols: Use standard symbols and provide a legend.
- Neglecting Updates: Always update diagrams after modifications.
Plumbing Riser Diagram vs. Other Plumbing Drawings
Here’s a quick comparison:
AspectRiser DiagramFloor Plan DiagramIsometric Diagram
Orientation Vertical (shows floors/levels) Horizontal (top-down view) 3D perspective
Primary Use Water/waste flow between floors Fixture locations on one level Visualizing pipe runs
Detail Level Pipe sizes, fixtures, connections Fixture placement Pipe routing, connections
Audience Plumbers, engineers, inspectors Architects, builders Plumbers, designers
You may also read (snake the plumbing)