
When winter approaches, preparing your home for freezing temperatures is crucial, especially if it will be vacant during the colder months. One commonly overlooked yet essential task is winterizing the plumbing system. Failure to do so can lead to many problems, including frozen pipes, water damage, and costly repairs.
What Is Winterization?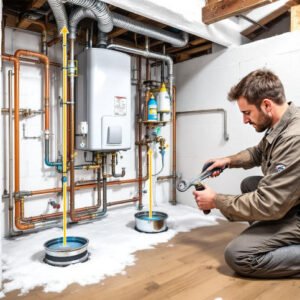
Winterization, in the context of plumbing, refers to preparing a home’s plumbing system to withstand freezing temperatures. This involves removing water from pipes, fixtures, and appliances to prevent damage caused by freezing and expansion.
Why Is Winterization Necessary?
When water freezes, it expands by about 9%. This expansion can put immense pressure on a home’s plumbing system, leading to burst pipes, leaks, and structural damage. Winterization aims to remove this risk by eliminating water from the system and adding protective measures like insulation and antifreeze.
Professional vs. DIY Winterization
- Professional Services: Hiring a professional plumber ensures the process is thorough and accurate. This is ideal for homes with complex plumbing systems or if you’re unsure of the steps.
- DIY Approach: For homeowners with basic plumbing knowledge, winterization can be done independently using some essential tools and materials (which we’ll discuss later).
Why Should You Winterize Plumbing in a Vacant House?
Leaving plumbing systems unattended during freezing weather is a recipe for disaster. Here are some reasons why winterization is critical:
Avoid Frozen Pipes
When water in pipes freezes, it expands and can cause the pipe to burst. This is especially common in unheated areas like basements, crawl spaces, and attics.
Prevent Costly Repairs
A burst pipe can lead to water damage, mold growth, and structural issues, which could cost thousands of dollars to repair.
Protect Property Value
Winterizing your plumbing is a proactive investment that helps maintain the integrity of your property, whether it’s a vacation home, rental property, or primary residence.
When Should You Winterize Plumbing?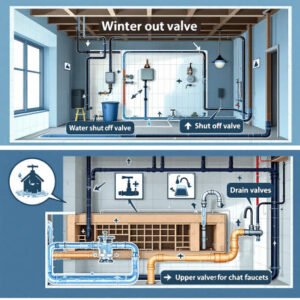
Timing is everything when it comes to winterization. Here’s how to determine the right moment to act.
You may also read (plumbing vent placement in your home)
Ideal Timing
The best time to winterize plumbing is before the first freeze. As temperatures drop, the risk of frozen pipes increases, so it’s essential to be proactive.
Weather Cues to Watch For
- Nighttime temperatures are consistently below 32°F (0°C).
- Frost appears on outdoor surfaces.
- Local weather forecasts predict a cold snap.
Regional Considerations
Homes in colder regions, like the northern U.S. or Canada, may require winterization earlier in the season than warmer areas. Understanding your local climate is key to staying ahead.
Essential Tools and Materials Needed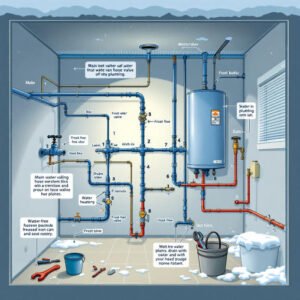
Before diving into the process, gather the following tools and materials to ensure a smooth winterization process:
Tool/MaterialPurpose
Wrenches For tightening or loosening plumbing fixtures
Air Compressor To blow out water from pipes and lines
Buckets To catch and drain water from faucets and appliances
Pipe Insulation To protect exposed pipes in unheated areas
Non-toxic antifreeze Prevents freezing in drains, traps, and toilets
Faucet Covers Insulates outdoor faucets and hose bibs
Heat Tape Keeps exposed pipes above freezing temperatures
Screwdrivers For removing or securing pipe fittings
Safety Precautions
- Always wear gloves when handling antifreeze.
- Turn off electricity to appliances like water heaters before draining them.
- Use proper ventilation if working in enclosed spaces.
Step-by-Step Guide: How to Winterize Plumbing in a Vacant House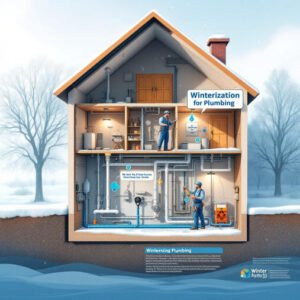
Let’s break down the winterization process into manageable steps.
Turn Off the Main Water Supply
Locate the main water shut-off valve in the basement or near the water meter. Close the valve to stop water from entering the system. This prevents additional water from filling pipes while you’re draining them.
Drain the Water Lines
- Open all indoor and outdoor faucets to release pressure and drain water.
- Start with the lowest faucet in the house to ensure complete drainage.
- Drain appliances like the water heater, washing machine, and dishwasher. Use buckets to catch any remaining water.
Drain Plumbing Fixtures
- Flush toilets and drain the tanks completely.
- Pour non-toxic antifreeze into toilet bowls and tanks to prevent freezing.
- Run showers, sinks, and bathtubs to ensure all water is removed.
Remove Water from Traps and Pipes
- Use an air compressor to blow out any remaining water in the pipes. This step is optional but highly recommended for thoroughness.
- Add antifreeze to all drains, including sinks, showers, and floor drains, to prevent freezing in the traps.
Insulate Exposed Pipes
Identify pipes in unheated areas (e.g., basements, crawl spaces, garages) and wrap them with pipe insulation or foam sleeves. For added protection, apply heat tape to vulnerable sections.
Prepare Outdoor Plumbing and Irrigation
- Disconnect and drain garden hoses.
- Shut off and drain outdoor spigots.
- Winterize irrigation systems by shutting off the water supply and using an air compressor to blow out the lines.
Set the Thermostat and Secure the Home
- Keep the thermostat set at 50–55°F (10–13°C) to prevent freezing.
- Seal any drafts around doors and windows to maintain warmth inside the home.
Final Checks and Maintenance
- Inspect the plumbing system for leaks or missed areas.
- Leave faucets slightly open to allow for expansion and evaporation.
- Please arrange for periodic inspections to ensure everything remains in good condition.
You may also read (snake the plumbing)