
When it comes to upgrading your bathroom, few changes offer as much impact as installing a new vanity. Not only does it improve the overall appearance of your space, but it also enhances functionality by providing additional storage and a fresh design aesthetic. Yet, for many homeowners, the thought of installing a vanity—especially over existing plumbing—might seem intimidating.
Understanding Bathroom Vanities and Plumbing Basics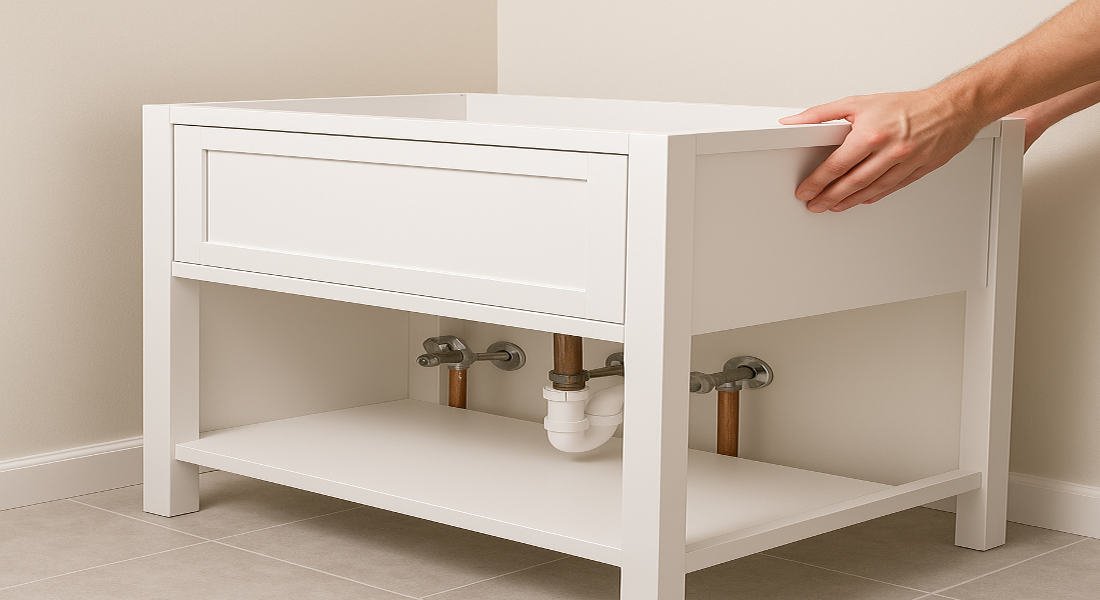
Before diving into the installation process, it’s essential to understand the basics of bathroom vanities and the plumbing behind them. This foundational knowledge will help you avoid common mistakes and ensure a smooth installation process.
What is a Bathroom Vanity?
A bathroom vanity is a combination of a sink and the storage cabinet beneath it. It serves both functional and aesthetic purposes, holding essential items like toiletries and cleaning supplies while complementing the bathroom’s design. Vanities come in several types:
- Floor-standing vanities: These traditional designs rest on the floor, offering ample storage space.
- Wall-hung vanities: Mounted on the wall, these modern designs give the illusion of more floor space and are ideal for smaller bathrooms.
- Worktop vanities: These focus on providing a countertop for the sink, with or without additional cabinets.
Overview of Home Plumbing Behind a Vanity
Plumbing behind a vanity typically consists of three key components:
- Water supply lines: These deliver hot and cold water to your faucet.
- Drain pipes: These remove wastewater from your sink to the sewage system.
- P-trap: A curved section of the drainpipe that prevents sewer gases from entering your home.
Proper installation is crucial to prevent leaks and ensure your vanity functions as intended.
Tools and Materials You’ll Need
Here’s a checklist of essential tools and materials to have on hand before starting your vanity installation:
Tools Materials
Tape measure Vanity unit
Stud finder Faucet
Level Plumber’s tape
Screwdriver Drain assembly
Drill and drill bits Adhesive or caulk
Hole saw Screws and wall anchors
Adjustable wrench Shims
Safety goggles Plumber’s putty
Preparing for Vanity Installation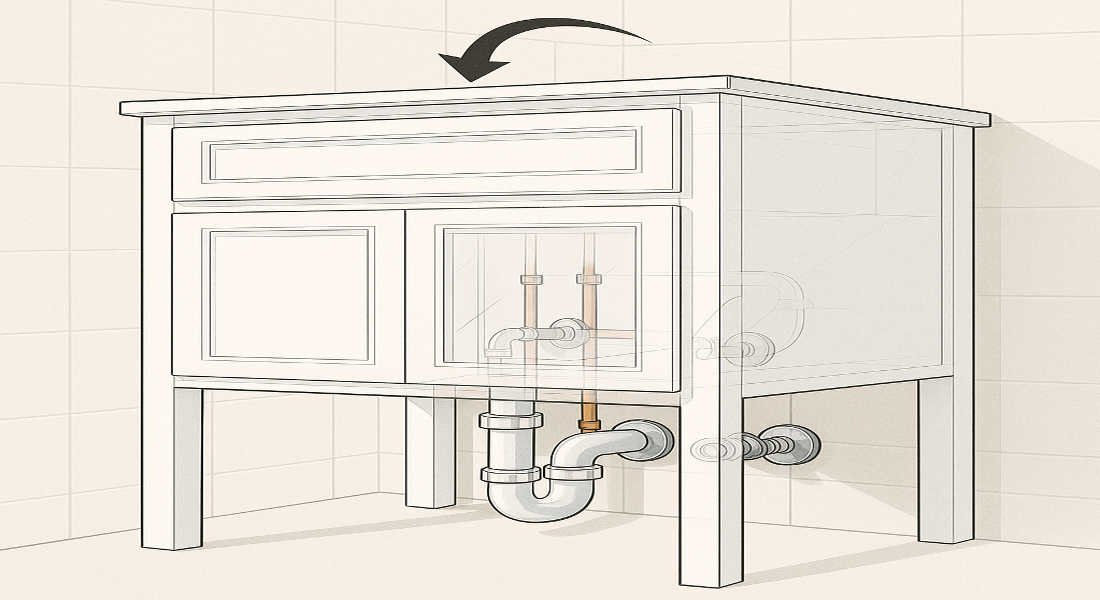
Installing a vanity requires proper preparation to avoid costly mistakes. Taking the time to prepare your space will make the actual installation process much easier.
Measuring Your Space Accurately
Start by measuring the area where your vanity will be installed. Take note of the width, height, and depth to ensure the new vanity fits perfectly. Don’t forget to account for plumbing access and clearance for doors or drawers.
You may also read (navigating plumbing permits a homeowners guide).
Removing the Old Vanity
If you’re replacing an existing vanity, you’ll need to remove it first. Follow these steps:
- Turn off the water supply.
- Disconnect the water supply lines and drain assembly.
- Carefully remove the vanity top and cabinet.
- Clean the area thoroughly, removing debris and old adhesive.
Preparing the Area
Once the old vanity is removed, inspect the wall and plumbing for any damage. Repair or reinforce any weak spots, especially if you’re installing a heavier vanity. Use a stud finder to locate wall studs and mark them for secure mounting.
Step-by-Step Guide: How to Install Vanity Over Home Plumbing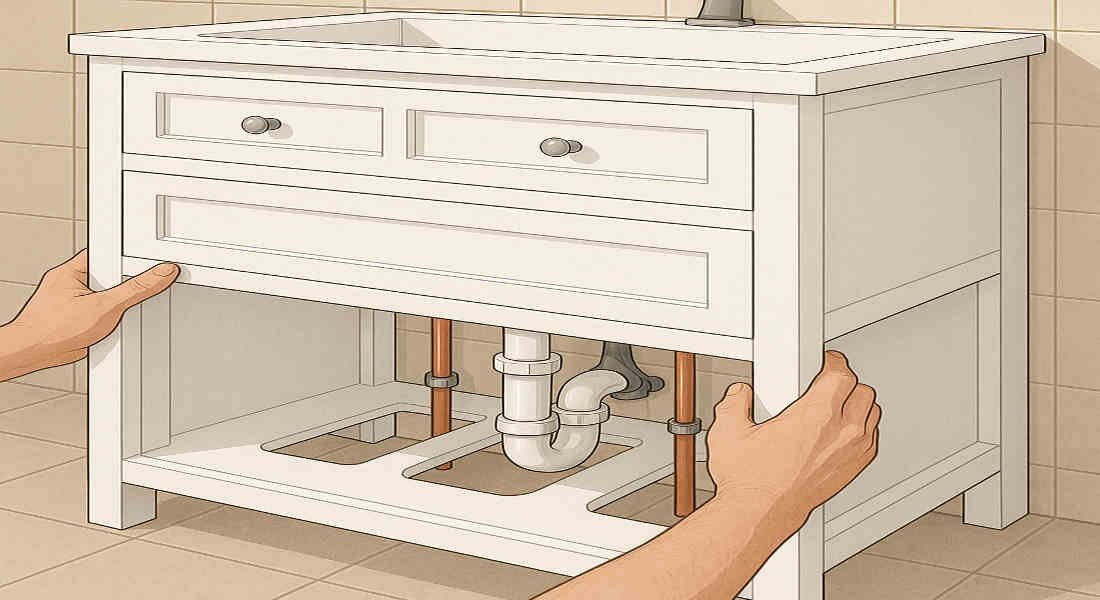
Now that your space is ready let’s walk through the step-by-step process of installing your vanity. Follow each step carefully for a smooth and successful installation.
Assemble the Vanity Unit
If your vanity comes in pieces, assemble it according to the manufacturer’s instructions. For easier handling, consider removing doors and drawers temporarily during installation.
Cut Openings for Plumbing (If Needed)
- Measure and mark the locations of water supply lines and drain pipes on the back of the vanity.
- Use a hole saw to cut openings for the pipes carefully. Take your time to avoid overcutting.
Position and Level the Vanity
- Slide the vanity into place, aligning it with the wall and plumbing connections.
- Use a level to ensure the vanity is even. If the floor is uneven, use shims or adjustable feet to correct the positioning.
Secure the Vanity to the Wall
- Drill pilot holes through the vanity back into the wall studs.
- Use screws to secure the vanity to the wall. If studs are not aligned, use wall anchors for stability.
Connect Plumbing and Drainage
- Attach the water supply lines to the faucet valves, applying Plumber’s tape to prevent leaks.
- Install the faucet and drain assembly according to the manufacturer’s instructions.
- Connect the P-trap to the drainpipe, ensuring all fittings are tight and sealed with the plumber’s putty.
- Turn on the water supply and test for leaks.
Install Vanity Top and Seal Edges
- Apply adhesive or caulk to the top of the vanity base and set the vanity top in place.
- Seal the edges with caulk to prevent water from seeping underneath.
You may also read (do tiny homes require building permits everywhere).
Final Adjustments and Clean-Up
- Reattach doors and drawers to the vanity.
- Clean the surrounding area and dispose of old materials properly.
- Congratulations! Your vanity is now installed and ready to use.
Tips for a Successful Vanity Installation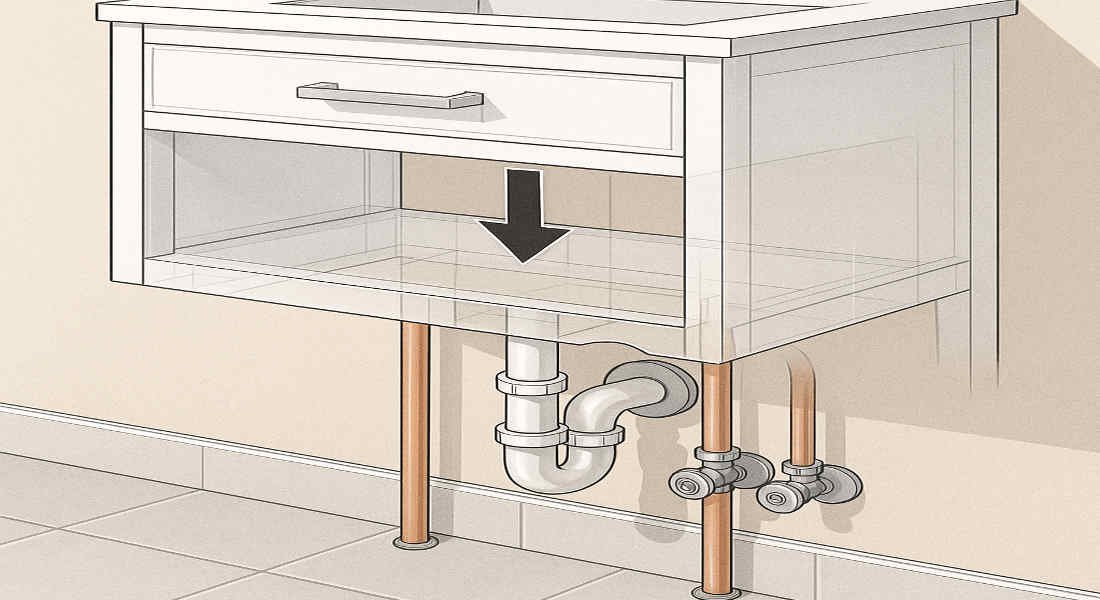
To ensure your project goes smoothly, keep these tips in mind:
- Double-check measurements before cutting or drilling.
- Use a level at every stage to ensure an even installation.
- Take your time when cutting openings for plumbing to prevent mistakes.
- Wear safety gear while working to protect yourself.
- If you’re unsure about plumbing connections, consider hiring a professional.
Common Challenges and How to Overcome Them
Even with careful planning, you might encounter some challenges during installation. Here’s how to address them:
- Uneven floors or walls: Use shims to level the vanity and caulk gaps to create a seamless look.
- Tight plumbing spaces: Use flexible connectors for easier access.
- Minor leaks: Double-check connections and apply additional Plumber’s tape or putty if needed.
- Adjusting vanity height: Use adjustable feet or add a platform beneath the vanity for a comfortable height.
Maintenance and Care for Your Vanity
To keep your vanity looking and functioning like new, follow these maintenance tips:
- Regular cleaning: Wipe down surfaces with a mild cleaner to remove dirt and moisture.
- Check plumbing connections periodically for leaks or loose fittings.
- Handle minor repairs promptly, such as tightening screws or resealing caulked edges.
You may also read (how to handle home plumbing without a license in nyc).