
When building a home with a concrete slab foundation, one crucial step you can’t afford to overlook is roughing in the plumbing. This process involves laying out and installing the pipes and connections that will eventually bring water in and wastewater out of your home. Unlike homes with crawl spaces or basements, plumbing under a slab requires meticulous planning and precision because, once the concrete is poured, changes are incredibly difficult—and costly—to make.
Proper rough-in plumbing for slab homes offers numerous benefits. It ensures your system is compliant with building codes, prevents leaks or blockages down the road, and lays the groundwork for a reliable plumbing system. Failing to get this step right could lead to expensive repairs, delays, or even structural damage to your home.
Understanding Rough-In Plumbing for Slab Homes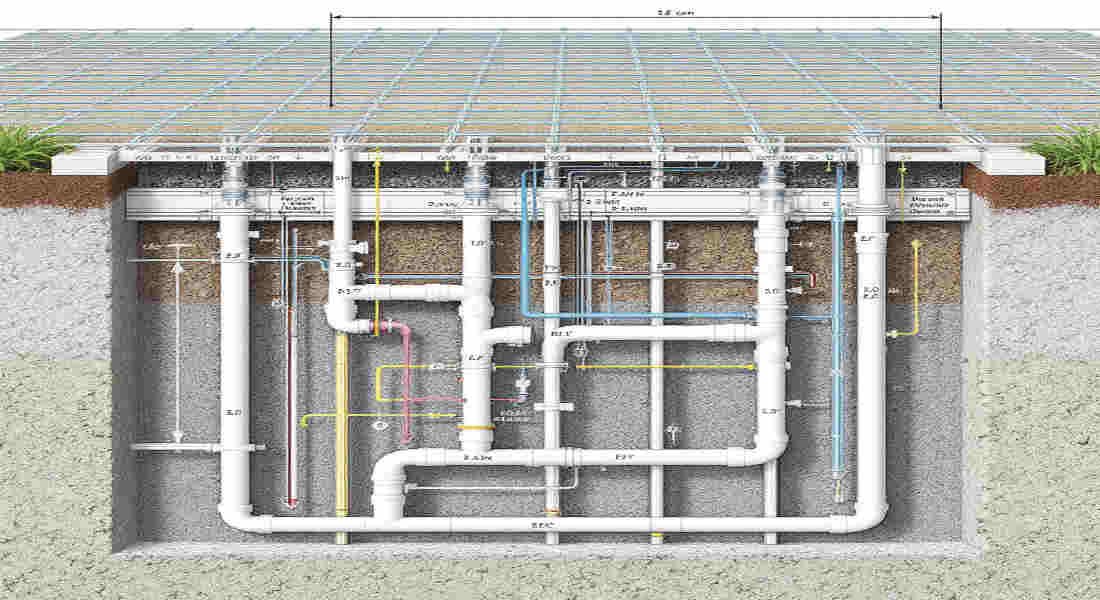
What Is Rough-In Plumbing?
Rough-in plumbing refers to the initial phase of plumbing installation. It involves laying out and installing pipes and fixtures before walls and floors are finished. In slab foundation homes, this means placing pipes below the concrete slab, as they will remain inaccessible after the slab is poured.
Why Is It Challenging?
Plumbing under a slab comes with unique challenges. Once the concrete is poured, accessing or repairing pipes becomes a major undertaking. Therefore, every step must be carried out with precision. Factors like pipe alignment, slope, and protection from concrete pressure are critical. Mistakes in this phase can lead to leaks, blockages, or even structural damage to your home.
Key Plumbing Components
Here are the typical components involved in slab plumbing rough-in:
- Drainage Pipes: Carry wastewater from fixtures like sinks, toilets, and showers to the sewer or septic system.
- Water Supply Lines: Deliver clean water to your home.
- Vents: Ensure proper airflow in the plumbing system to prevent sewer gases from entering your home.
Importance of Local Building Codes
Every municipality has its own plumbing codes and permit requirements. Before starting, check your local building regulations to ensure compliance. This will save you from costly fines or rework later.
Common Materials Used
For slab plumbing, the most commonly used materials include:
Material Features & Benefits
PVC Pipes are Affordable, durable, and corrosion-resistant.
CPVC Pipes are Similar to PVC but can handle higher temperatures.
ABS Pipes are lightweight and impact-resistant and are often used for drains.
Each material has its advantages, but PVC is a popular choice due to its cost-effectiveness and ease of installation.
Planning Your Plumbing Layout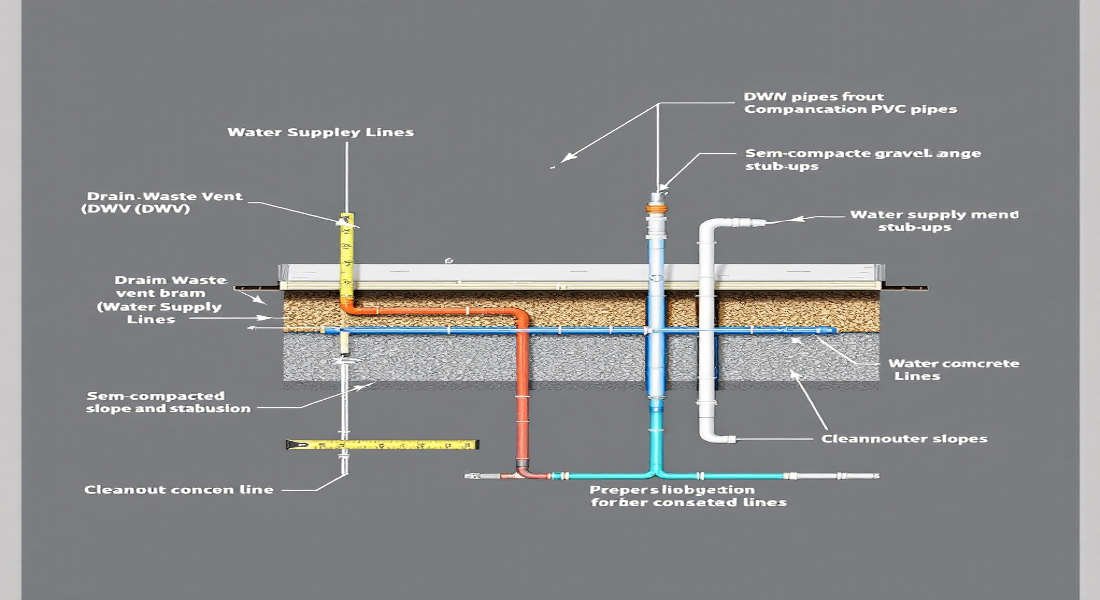
Why Planning Is Critical
Before you start digging trenches or cutting pipes, you need a detailed plumbing layout. Proper planning ensures all your pipes are in the right place, aligned with your fixtures, and meet building code requirements.
Steps to Design a Plumbing Layout
- Mark Fixture Locations: Identify where toilets, sinks, showers, and other fixtures will be placed. Use your home’s floor plan as a guide.
- Map Drain Lines and Water Supply Routes: Use tools like string lines, stakes, and levels to outline where pipes will run.
- Plan for Venting: Vents are critical for maintaining airflow in the system.
- Include Cleanouts: These are access points for clearing clogs in your pipes.
Importance of Proper Slope
One of the most critical aspects of plumbing design is ensuring a proper slope for your drain pipes. A slope of 1/4 inch per foot is generally recommended to allow wastewater to flow efficiently.
Future Access Points
Consider installing future-proof features like pipe sleeves or access panels. These additions make repairs or upgrades easier without breaking the slab.
Gathering Materials and Tools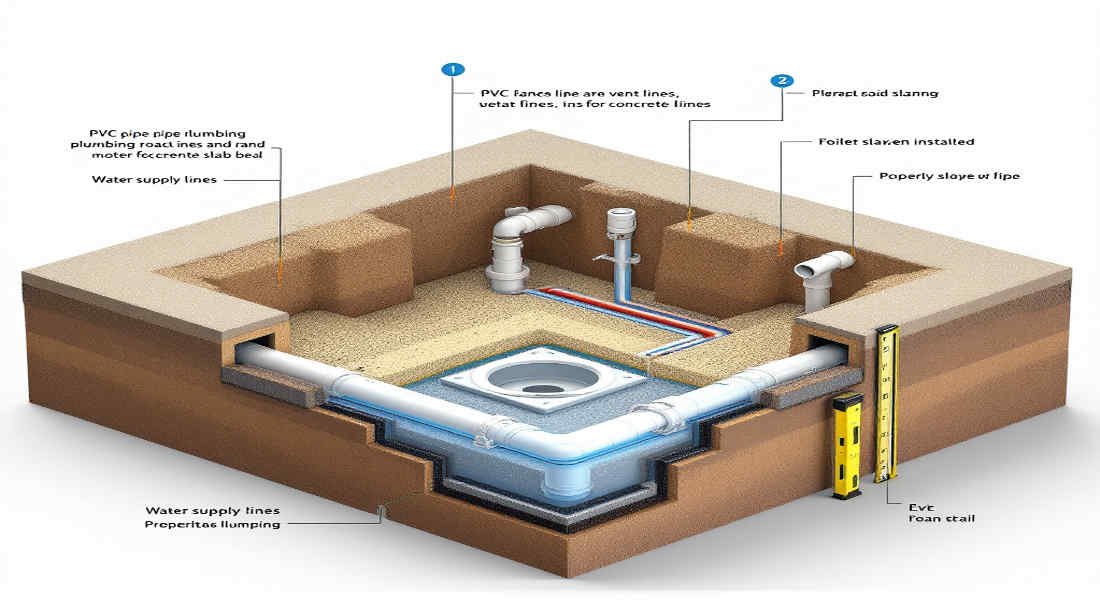
Essential Materials
Here’s a checklist of materials you’ll need for rough-in plumbing:
- Pipes: PVC, CPVC, or ABS, depending on your needs.
- Fittings: Elbows, tees, couplings, and other connectors.
- Pipe Sleeves: Protect pipes where they pass through concrete.
- Plastic Cement: For sealing pipe joints.
- Rebar and Anchors: If required for structural support.
You may also read (how to clean your home to prevent cockroaches).
Essential Tools
To install plumbing under a slab, you’ll need:
- Pipe cutter or saw
- Tape measure and level
- Pipe wrench
- Trenching tools
- Safety gear (gloves, goggles, etc.)
Pro Tip: Using a laser level can help ensure your pipes have the correct slope and alignment.
Preparing the Slab for Plumbing Rough-In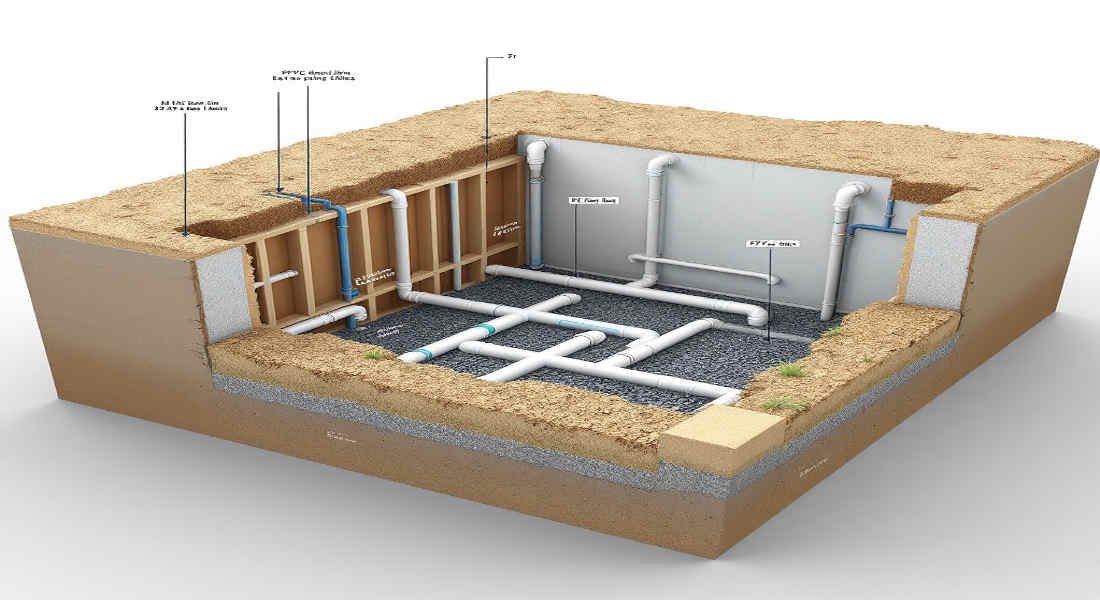
Step-by-Step Preparation
- Clear the Area: Remove debris, rocks, and other obstacles from the slab base.
- Inspect for Cracks or Weaknesses: Repair any visible damage before proceeding.
- Install Rebar or Mesh: If required, lay down the rebar for structural stability.
- Lay Moisture Barriers: Use plastic sheeting to prevent moisture from seeping through the slab and damaging pipes.
- Install Pipe Sleeves: These protect pipes from concrete pressure and allow for slight movement.
Why Preparation Matters
Proper preparation ensures that your pipes remain secure and functional for years to come. Skipping these steps can lead to costly repairs down the road.
Installing the Plumbing System Under the Slab
Excavation and Trenching
Start by digging trenches for your pipes. The depth and width should match your plumbing layout. Ensure the trenches are level and properly sloped for drainage.
Cutting and Assembling Pipes
- Measure and cut pipes to the required lengths.
- Use fittings like elbows and tees to connect pipes.
- Secure joints with plastic cement or glue.
Ensuring Proper Slope
Lay drain pipes with a consistent slope of 1/4 inch per foot. This ensures wastewater flows smoothly without blockages.
Installing Sleeves and Supports
Place pipe sleeves where pipes pass through the slab. Use supports to keep pipes in place and aligned.
Pressure Testing
Before pouring concrete, pressure test your system. This involves filling the pipes with water or air to check for leaks. Fix any issues before moving forward.
Filling and Finishing the Slab
Pouring Concrete
Carefully pour concrete over the plumbing system. Avoid disturbing the pipes during this process. Spread and level the concrete evenly.
Smoothing and Curing
Use tools to smooth the slab’s surface. Allow the concrete to cure for the recommended time before proceeding with further construction.
Common Mistakes to Avoid
- Skipping Permits: Always secure the necessary permits before starting.
- Improper Slope: Incorrect pipe slopes can lead to drainage issues.
- Using Substandard Materials: Invest in quality pipes and fittings.
- Skipping Pressure Tests: Always test for leaks before pouring concrete.
You may also read (how to terminate home plumbing vents horizontally).